A Simple Guide to Harsh Sunlight Photography
Photography under the midday sun can be as challenging as it is exciting.
I mean, who doesn’t love the sun?
And while a ton of natural light is nice, the direct and intense sunlight can cast stark shadows, create harsh contrasts, and wash out your subject.
But with some creativity and technique, you can turn these challenges into amazing photos where you can’t even tell you had any problems taking them.

And with these tips, harsh sunlight photography won’t be a problem at all. Instead, taking photos in the sun can become some of your best photos yet!
So, let’s learn and talk about how to shoot photos in harsh sunlight.
8 Tips for Harsh Sunlight Photography
The biggest problem with taking pictures in the sun is the strong shadows and high contrast it creates.
Here are 8 tips you can use right away to solve this problem:

- Shoot in Manual Mode: Take control of your exposure settings to properly expose for the skin tones or the most important part of your scene. Automatic modes might get confused by the strong light and shadows.
- Positioning Matters: Be mindful of where the sun is and use it to shape your subject. Position your subject so that the sun acts as a backlight or side light, which can create a rim light effect or define the subject’s shape.
- Use Fill Flash or Reflectors: To balance the harsh shadows on your subject’s face, use a fill flash or a reflector. This can help to soften the appearance of shadows, providing more even lighting on the subject.
- Find Open Shade: Look for areas where there is open shade to place your subject. This can provide a more even light and reduce the intensity of the shadows.
- Use Spot Metering: This metering mode allows you to expose for a specific area of your frame, such as your subject’s face, and can be useful in high contrast situations.
- Embrace the Harsh Light: Use the strong light to create high contrast, dramatic images. This can be particularly effective for black and white photography.
- Shoot During Golden Hours: If possible, plan your shoots during the golden hours (shortly after sunrise or before sunset) when the sunlight is softer and more flattering.
- High ISO Settings: Keep your ISO low to avoid unnecessary noise in the bright conditions. A lower ISO also allows for a smaller aperture and faster shutter speed, giving you sharper images with more depth of field.
By using these tips, you can turn the challenge of harsh sunlight into an opportunity to create stunning, dramatic photographs with a unique mood and character.
And if you’d like to learn more about taking photos in harsh sunlight, keep reading!
Understanding Harsh Sunlight
When you’re out with your camera under a bright sun, you face different challenges, yet you can capture some of the most dramatic scenes.
Let’s explore what you need to know about shooting in strong light.

Harsh Sunlight Challenges
Harsh sunlight refers to the intense light that is usually present midday when the sun is high in the sky. Difficulties you might encounter include:
- Contrast: The dynamic range, or contrast, between the brightest highlights and the darkest shadows becomes extreme. Your camera may struggle to capture detail in both these areas simultaneously.
- Highlights: Watch out for overexposed spots where the sun’s glare can wash out all the detail.
- Shadows: Deep, crisp shadows can create a stark effect, which might be too intense for some subjects but beneficial for others.
The Benefits of Harsh Sunlight
Despite its challenges, sunlight can be a powerful ally for creating good photos with:
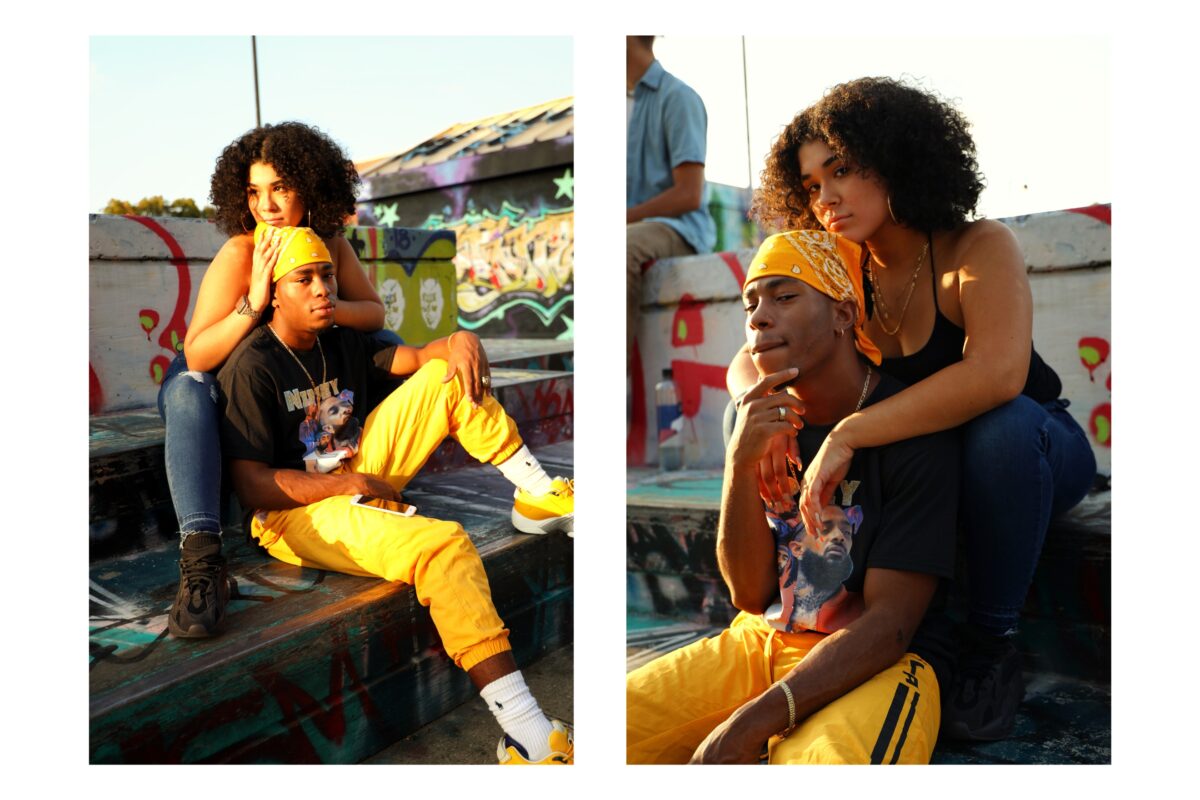
- Dramatic Effect: The strong contrast and bold shadows can add a sense of drama and depth to your images.
- Vibrant Colors: Sometimes, harsh sunlight can bring out vibrant colors that are less pronounced in softer light.
Camera Settings for Bright Sunlight
When there’s a lot of sun, getting exposure right can be challenging. But with some tweaks to your camera settings, you’ll be good to go. Here’s how to do that.
Adjusting Exposure
Your first step should be to adjust your camera’s exposure. Exposure determines how light or dark your image will be. In manual mode, you have the flexibility to do this.
Then use your camera’s light meter to judge the right exposure level. Aim for the meter to be at ‘0’ or just a slight minus for bright conditions.
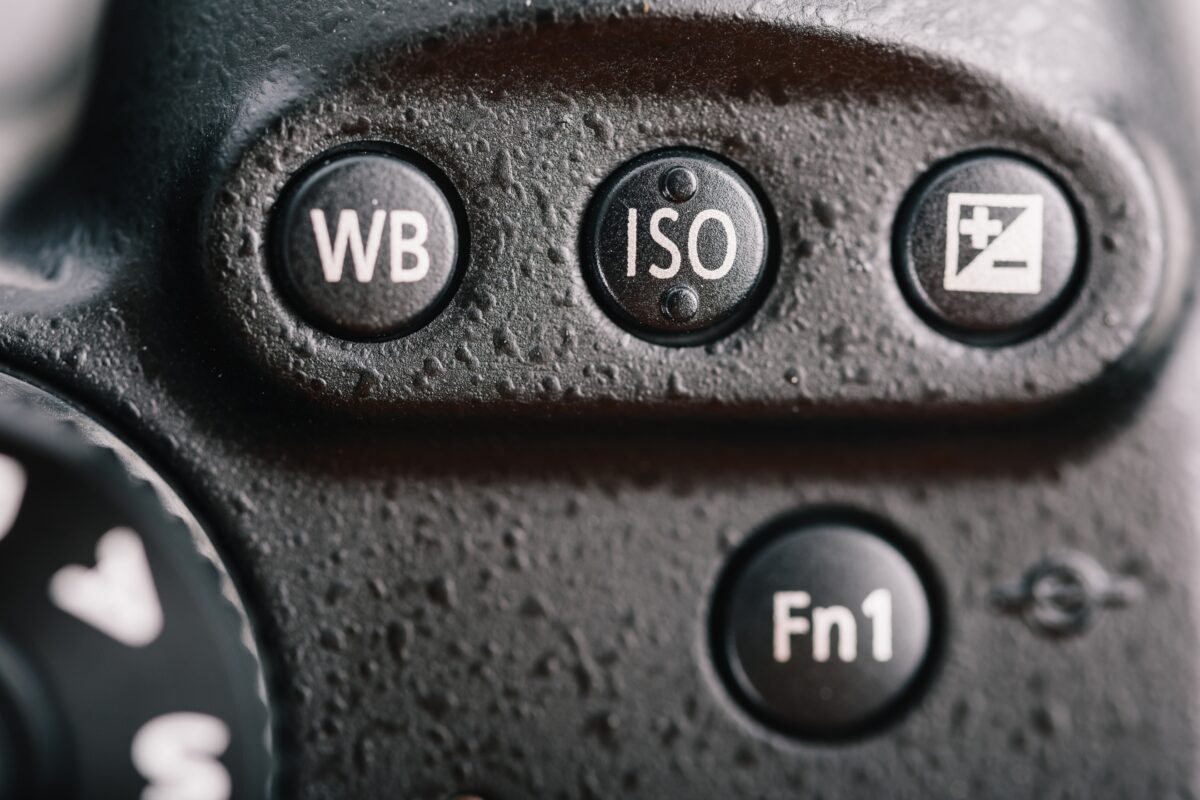
Modifying ISO
ISO controls your camera’s sensitivity to light.
In harsh sunlight, you’ll want a low ISO, around 100 or 200, to reduce the risk of overexposed and grainy images. And the brighter the day, the lower the ISO you should use.
Optimal Aperture and Shutter Speed
Aperture and shutter speed work together to refine your image’s exposure.
Use the Sunny 16 rule as a starting point: set your aperture to f/16 on a sunny day.
For shutter speed, match it to the inverse of your ISO. If your ISO is 100, set your shutter speed to 1/100 seconds. You may need to adjust this slightly according to the intensity of the sun.
And remember, these are only starting points. Check your results and adjust your settings as necessary for the perfect shot in the sun.
Using Natural Shade
When the sun is glaring down, look for some natural shade.
Think of shade as a natural diffuser that softens the intense sunlight and gives you more control over the lighting in your composition.
Finding Natural Shade
Scout for locations where natural shade is present.
Look for structures or landscapes offering a break from the sun. Buildings, overhangs, and alleyways work well. And can provide lines of shade that create dramatic effects on your subject.
Keep in mind the time of day as well since the position of the sun will dictate where these shaded havens can be found.
- Open Areas: Parks and open fields may have scattered areas of shade as the sun moves across the sky.
- Urban Spaces: Cityscapes often have dynamic patterns of shade, especially as sunlight weaves through towering structures.
And keep in mind shade can move and change shape. But this isn’t a problem as it can add a different look to your photo.
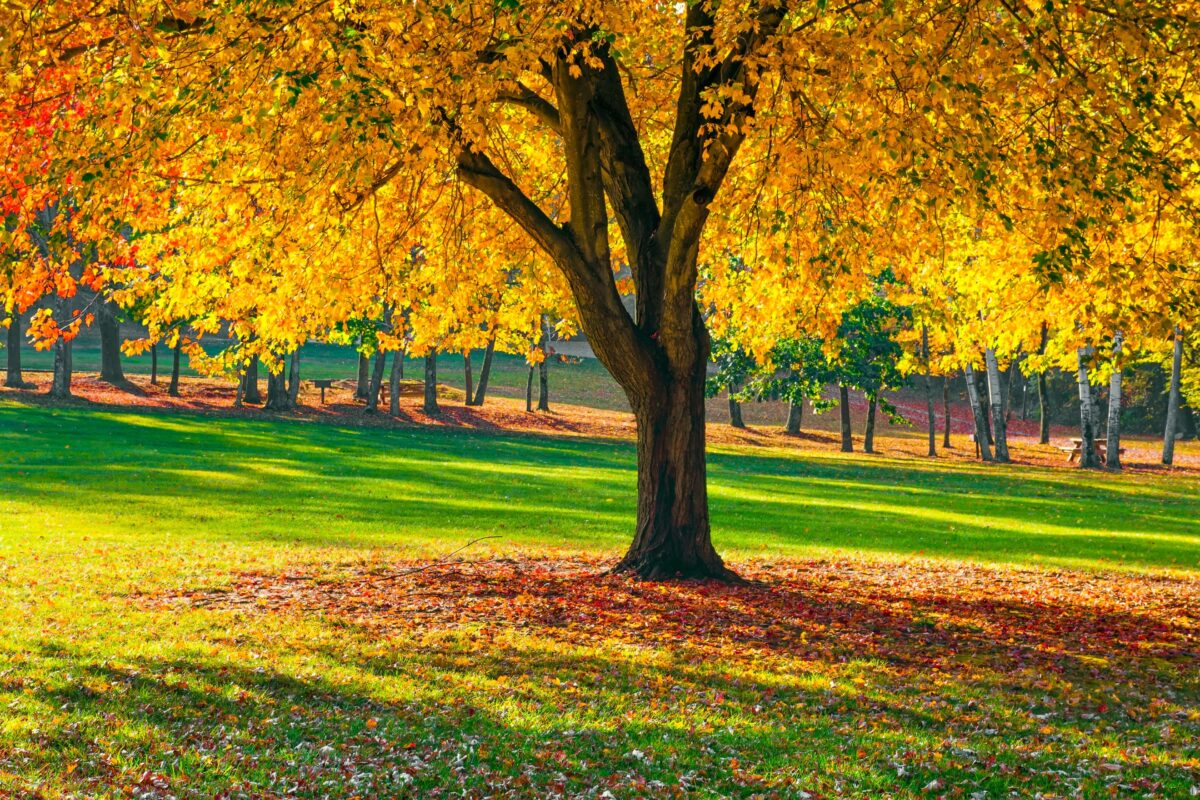
Shooting Under Trees
Trees are not just scenic.
The leaves and branches create a patchwork of light that can cast fascinating shadows or a mottled effect known as “dappled light.”
Here’s how to make the most out of shooting under trees:
- Position your subject just at the edge of the shaded area, where natural light is softer.
- Be aware of ‘hot spots’, areas where the sunlight penetrates through the leaves, which you can use to your advantage for artistic effects or avoid for a more even exposure.
- Look up and around: Assess the density and pattern of the foliage to predict how the light will fall on your subject.
Creative Techniques in Sunlight
Backlighting and Silhouettes
When you position your subject between the sun and your camera, you get some dramatic backlighting.
This technique emphasizes shapes and outlines, turning your subject into a mysterious silhouette. The depth created through this method adds a layer of intrigue to your photo. Here’s how to do it:
- Make sure the sun is directly behind your subject to get a strong silhouette effect.
- Adjust your exposure to darken the foreground and enhance the silhouette’s prominence.
Using Lens Flares Creatively
Lens flares aren’t just accidental.
They can be an intentional part of your composition. To introduce lens flares in a way that contributes to your picture, experiment with angles and positioning.
- Partially block the sun with an object to create a soft flare that doesn’t overwhelm the scene.
- Use manual focus to prevent your camera from correcting the flare, allowing your creative intent to shine through.
Both of these techniques allow you to use sunlight not as a hindrance but as a partner in creating visually compelling photographs.
Tools to Soften Harsh Light
When the sun is at its peak, your photos can suffer from harsh shadows and overexposure. Fortunately, you have tools to tame the sunlight and take beautiful images even in the toughest light.
Reflectors and Diffusers
Reflectors and diffusers work to redirect or soften the sunlight so your subjects are evenly lit and free from harsh shadows.
- Reflectors: These come in handy when you need to bounce light onto your subject. They can be as simple as a piece of whiteboard or sophisticated collapsible discs with different reflective surfaces—silver for a cooler light, gold for warmth, and white for a softer touch.
- Diffusers: Imagine diffusers as a cloud you can summon at will. They are placed between the sun and your subject to scatter and soften the light, simulating a cloud cover on a bright day. Whether it’s a dedicated fabric diffuser or a sheer white cloth, diffusers are essential for creating that gently lit look.
Filters for Controlling Light
Filters are like sunglasses for your camera.
I consider it a layer of protection for your lens as well. They attach to your lens and reduce the amount of light that reaches the sensor, allowing for more control over exposure and color balance.
- ND Filters (Neutral Density): Think of ND filters as a dimmer switch for your lens. They help you lower the light intensity, which can be a lifesaver if you want to use a wide aperture for a shallow depth of field or capture motion with a longer exposure.
- Polarizing Filter: These are your go-to for reducing glare and reflections. They can make skies bluer, colors richer, and clouds pop. Rotate the filter until you see the effect you desire—like magic, the reflections and glare are minimally invasive, and your photos come to life.
Consider a polarizing filter a must-have in your camera bag, especially for capturing water scenes and windows without that distracting shine.
Portrait Photography in the Sun
When you’re capturing portraits in full sunlight, knowing how to work with models and manage skin tones can transform harsh lighting conditions into an opportunity for stunning photographs.
Working with Models
As a portrait photographer, communication matters a lot.
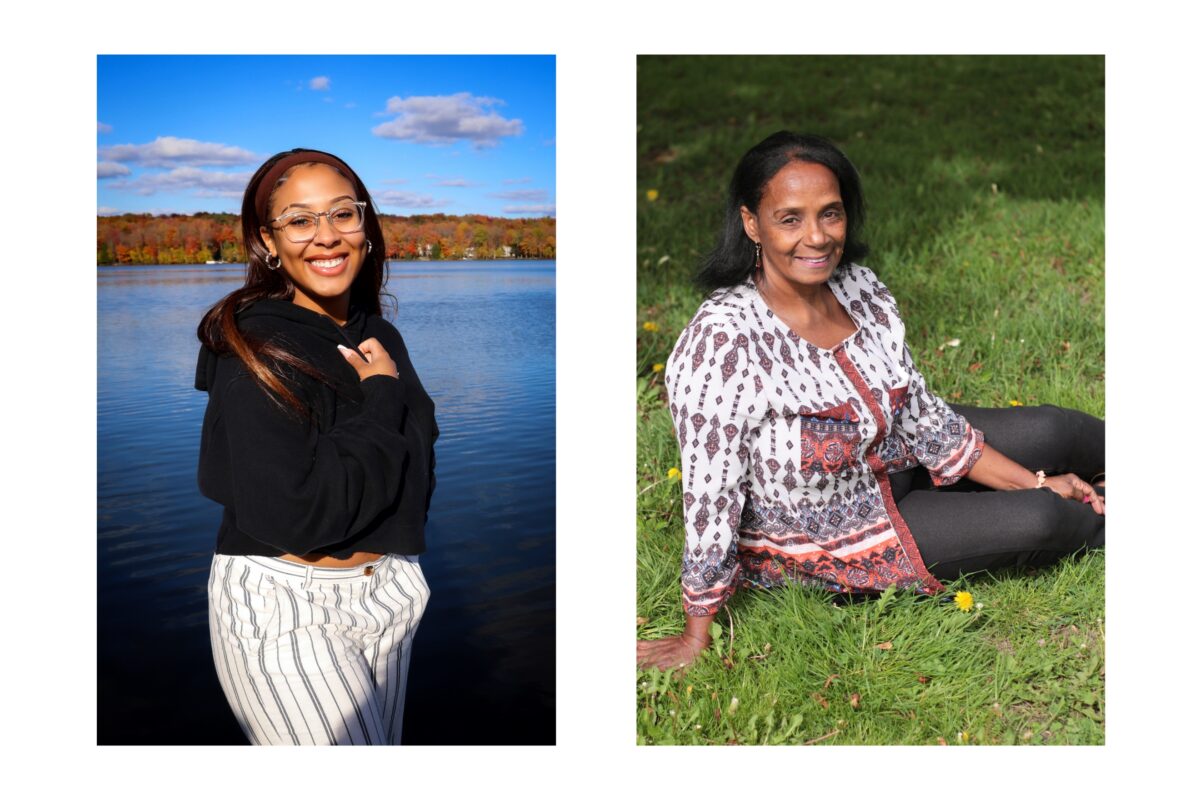
Communicate and position your model so the sun acts as a natural backlight or side light, minimizing squinting and unflattering shadows on their face.
Also, encourage them to stay relaxed.
A comfortable model can better handle the intensity of sunlight, which in turn helps you capture authentic expressions. Using a diffuser can also soften the light, making it more flattering for your model’s skin.
Controlling Skin Tones
Proper exposure is necessary to ensure skin tones look natural and not washed out by the sun’s intensity.
Consider using your camera’s manual mode to refine exposure settings and rely on your histogram as a real-time indicator to avoid overexposed highlights.
Also, shoot in a RAW format so you have more leeway during post-processing to adjust the skin tones accurately.
If you face challenges with harsh shadows and contrast, using fill flash or a reflector can help to balance the lighting on your client’s skin.
Post-Processing Sunlit Photos
When you’ve captured photos under the bright sun, the real magic often happens during post-processing.
This is where you can correct issues that harsh sunlight might have introduced to your photos, such as overexposed highlights or lackluster colors.
Adjusting White Balance and Contrast
The white balance in your sunlit photos can sometimes be off, giving your images a cooler or warmer tint than desired.
To fix this in post-processing software like Adobe Lightroom, navigate to the white balance selector tool and manually adjust the temperature slider until the colors accurately reflect the scene as you remember it.
Next, tweaking the contrast can help define your subject more crisply.
Slide the contrast bar incrementally to find the sweet spot where the depth and dimension of the image feel right, taking care not to lose detail in the process.
- To adjust white balance:
- Find the white balance selector tool.
- Move the temperature slider until the color looks natural.
- To adjust contrast:
- Incrementally slide the contrast bar.
- Watch for necessary details to make sure they don’t disappear.
Working with Highlights and Shadows
Harsh sunlight can create extreme highlights and deep shadows in your photos, but you can handle that.
If you’re shooting in RAW, you have the advantage of being able to recover more details from these areas. Pulling down the highlights slider will retrieve details in bright spots while lifting the shadows slider can reveal hidden details in dark areas.
It’s like having a conversation with your image, asking politely for all the complicated details to come forward and take their place in the story of your photo.
- To manage highlights:
- Decrease the highlights slider to restore details in bright areas.
- Decrease the highlights slider to restore details in bright areas.
- To manage shadows:
- Increase the shadows slider to uncover details in darker zones.
And make these adjustments gently. Because you want to preserve the integrity of your image without making it look artificial.
Frequently Asked Questions
How can I prevent shadows on faces in direct sunlight?
To prevent harsh shadows on faces, position your subject at an angle to the sun rather than directly facing it. Use a fill flash to lighten the shadows, or opt for a reflector to bounce the light evenly onto the face.
What are the best camera settings for harsh sunlight photography?
In bright sunlight, start with a low ISO, such as ISO 100 or 200. Set your aperture to f/16, known as the “sunny 16” rule, and adjust the shutter speed to achieve the correct exposure. Experiment with these settings, as the best combination can vary with conditions.
How can I achieve a hazy effect when photographing in harsh sunlight?
Shoot towards the sun, using its position just outside of your frame to create a natural glow, for a dreamy, hazy effect. A lens hood can help manage lens flare while maintaining the desired hazy look.
Is there a technique to take portraits with the sun in the background?
Yes, when taking portraits with the sun in the background, use spot metering mode to correctly expose the subject’s face. Position the subject between you and the sun to create a beautiful backlit effect that separates them from the background.
Can I use my phone to capture good quality pictures in bright sunlight?
Absolutely! On your smartphone, tap the screen to focus on your subject and slide the exposure icon to adjust the brightness. Use HDR mode to balance the highlights and shadows, or wait for golden hour when the sun is less intense.
What equipment is needed for outdoor photography in strong light conditions?
A polarizing filter can reduce glare and enhance the sky’s blue, while a sturdy tripod will steady your shot in windy conditions. Always have lens hoods and reflectors at hand to manage the light and avoid lens flare.


