Auto vs. Manual Mode: What Photographers Should Know
You’re out with your camera, ready to capture the world through your lens. But then, frustration hits.
Your shots are either too dark or glaringly bright. Why?
Your camera’s auto mode is playing boss, making all the decisions for you. It’s like trying to cook a 5-star meal using your microwave. It’s quick but not quite satisfying.
The taste just doesn’t hit right!
This is because relying solely on auto mode can be restricting. Especially when you’re trying to take a photo that requires creative control over your camera settings. This is where understanding and mastering manual mode becomes important.
In manual mode, you can fine-tune settings. This gives you the creative control to produce images that match your artistic intent.
So, this article will serve as a guide to help you navigate the complexities and nuances of auto vs. manual mode as a photographer.
By reading this article, you’ll grasp the basics of each mode and learn when and how to use them effectively. Also, along the way, you’ll pick up tips and tricks for transitioning from auto to manual mode.

Key Takeaways – Auto vs. Manual Mode Photography
- Auto mode is helpful for beginners, but it limits creative control.
- Manual mode offers complete control over exposure settings.
- Understanding both modes enhances your photography skills.
What Is Auto Mode?
Auto Mode is the setting on your camera that automates critical decisions. Selecting Auto Mode on your camera tells it to adjust the aperture, shutter speed, and ISO based on the lighting conditions around you.
It’s essentially the ‘point-and-click’ option for photography.
This makes it an excellent choice for beginners or situations where you must quickly capture a shot. You’ll usually find Auto Mode indicated by’ A’ or’ Auto’ on your camera.
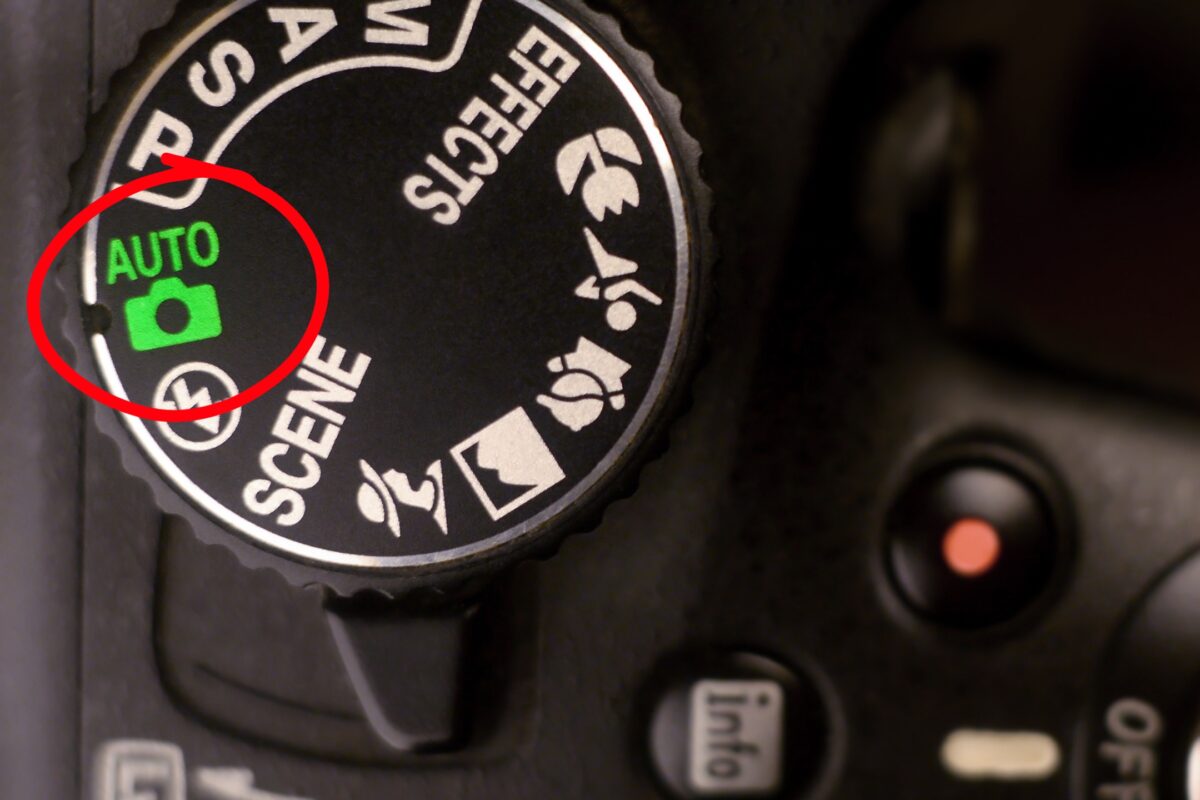
It comes in handy when you’re not yet comfortable manipulating settings manually or when conditions are changing rapidly, and you want to make sure you get a decent exposure.
The Benefits and Limitations of Auto Mode
Auto Mode on your camera is nice if you’re dipping your toes into photography.
Because you can focus on getting that perfect shot without worrying too much about overexposed or too-dark mistakes.
But, it doesn’t come without its drawbacks.
Sharpness and brightness are left to the camera’s interpretation, which might not align with the scene you’re photographing. And while the camera’s light meter works to avoid blurry images, your creative control is limited.
You can’t play with depth of field or motion blur as easily as you could in Manual Mode.
So, while Auto Mode offers you reliable performance and convenience, especially for casual shots or when you’re still learning, it’s worth knowing that it might not always be the best option.
But, as a beginner photographer, this mode allows you to concentrate solely on your subject and timing. And that’s a solid start to your photography journey.
What Is Manual Mode?
When you switch your camera to Manual Mode, often denoted as ‘M’ on the mode dial, you get complete creative control over your photography.
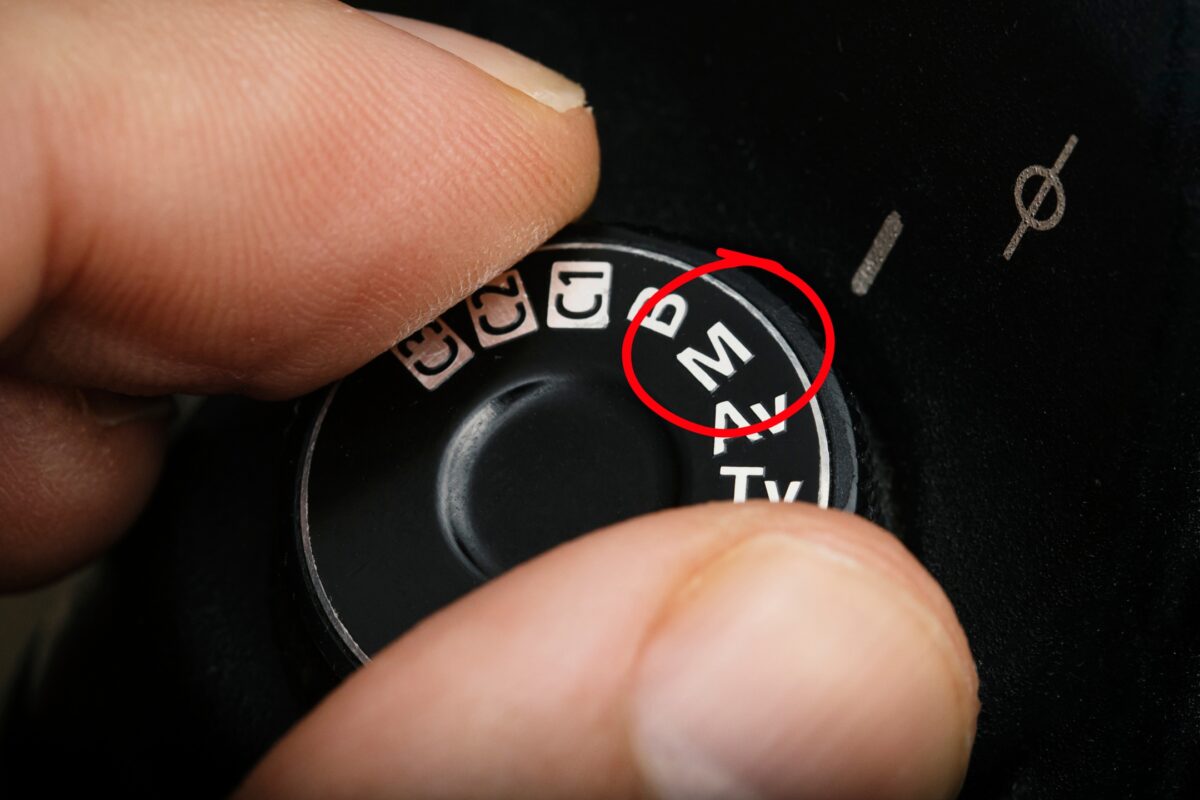
In this setting, every major aspect of exposure—the ISO, shutter speed, and aperture—is in your hands.
And forget about the camera making decisions for you.
Here, you’re the one who calls the shots.
- Aperture: This is the size of the opening in your lens, measured in f-stops. A larger aperture (smaller f-stop number) lets in more light, decreasing the field depth and keeping the foreground sharp while blurring the background. It’s crucial in low-light conditions and for achieving that soft background known as bokeh.
- Large aperture: more light, shallow depth of field
- Small aperture: less light, greater depth of field
- Shutter Speed: It’s the duration your camera’s shutter is open to let light hit the sensor. Faster shutter speeds freeze action, capturing sharp images of moving subjects, while slower speeds can introduce motion blur, which is great for creative effects like showing speed.
- Fast shutter speed: freezes motion
- Slow shutter speed: motion blur
- ISO: This determines your camera sensor’s sensitivity to light. A lower ISO means less sensitivity and noise, resulting in cleaner images. A higher ISO allows shooting in darker conditions but can introduce noise, which reduces image quality.
- Low ISO: less sensitive, cleaner images
- High ISO: more sensitive, potential for noise
Embrace the freedom Manual Mode offers and experiment to find the right balance for your photos. It might take a bit of trial and error.
But it’s the best way to refine your skills and develop your unique style of photography.
Why Does Auto vs. Manual Mode Matter as a Photographer?
For professional photographers and those who have the basics down, manual mode is where the best shots are taken with full creative control.
It’s like being the driver behind a high-end sports car. You decide the pace and direction.
It allows you to tweak each setting to create the exact image you want. But, it does come with a learning curve.
And your comfort level with these modes will likely ebb and flow with your confidence.
When to Use Auto Mode
As a beginner in photography, you might find yourself at dynamic events where things move fast. Here, Auto mode is your friend.
And for casual photos where you don’t want to fiddle with settings, Auto mode is the go-to. It frees you up to focus on composition and capturing the moment rather than mechanics.
Point-and-shoot cameras excel in this mode, making photography convenient and accessible to anyone, regardless of experience.
When dealing with varied lighting conditions, Auto mode can quickly adapt.
It ensures your shots are well-exposed in bright sunlight or a dimly lit room. This lets you focus on your subject rather than on camera settings, making your photography experience enjoyable and hassle-free.
How to Transition from Auto to Manual in 6 Steps
- Get Comfortable With Semi-Automatic Modes: Start by exploring Aperture Priority (Av/A) and Shutter Priority (Tv/S) modes. This hands you control over one key element of exposure while the camera adjusts the others. It’s an excellent way to learn the impact of aperture and shutter speed on your images.
- Play With Focus: Your camera’s autofocus is great, but manual focus gives you pinpoint control. Try switching your lens to manual focus and practice getting sharp images, especially in challenging lighting.
- Understand Exposure: Learn the exposure triangle (aperture, shutter speed, ISO). Experiment with these in semi-automatic modes before combining them in full manual mode. This helps develop a feel for how they interact.
- Master One Setting at a Time: Take your time to understand each setting individually. Adjust your aperture to see how it affects depth of field and sharpness. Then, play with shutter speed to freeze or blur motion.
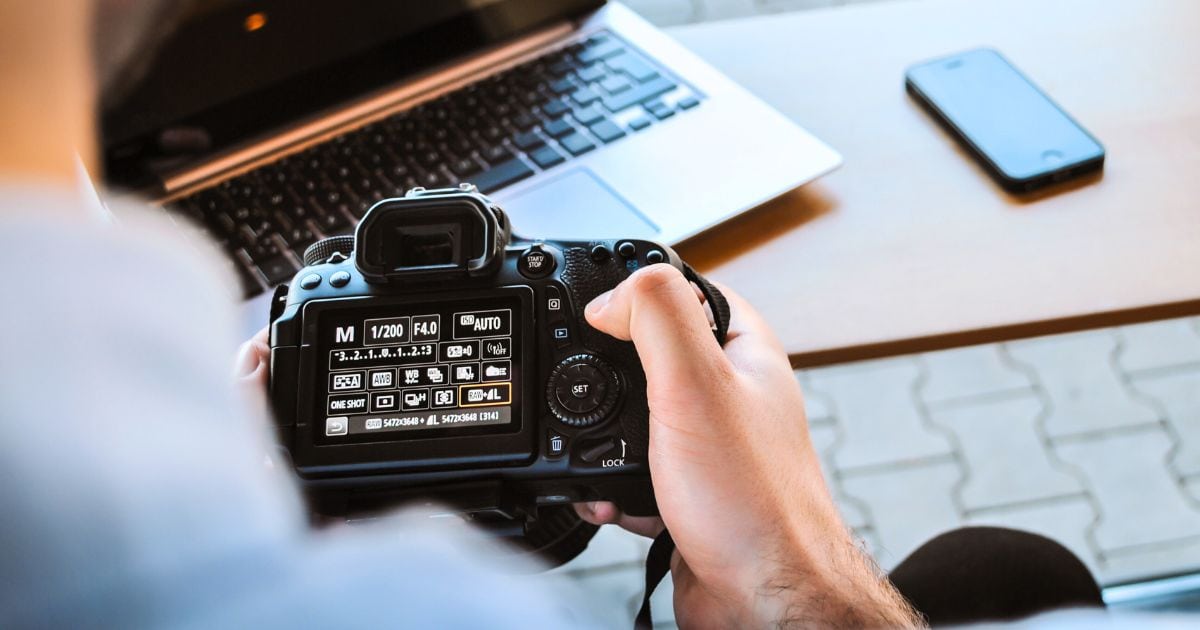
- Use a Light Meter: Use your camera’s built-in light meter. Watch how adjustments to camera settings move the indicator, aiming for the ‘0’ mark, which suggests a well-exposed photo.
- Practice: Transitioning to manual mode isn’t a race. The more you practice, the more instinctive managing the settings becomes. Regularly challenge yourself with new lighting situations and subjects.
Practice Exercises You Can Try
Here are some practical exercises to help you understand your camera’s manual settings. Start small and give yourself time to familiarize yourself with the basics of ISO, shutter speed, and aperture—the trio that governs exposure.
- ISO: Begin by adjusting ISO settings in different lighting. Start at ISO 100 on a bright day and see what happens as you increase it. Notice the graininess as it goes higher.
- Shutter Speed: Experiment with shutter speed to understand motion. On a moderately busy street, play with slow shutter speeds to blur movement, then increase it to freeze the action.
- Aperture: Switch to adjusting aperture and take note of how it affects depth of field. Shoot the same scene at f/2.8 and then at f/11 to compare the differences.
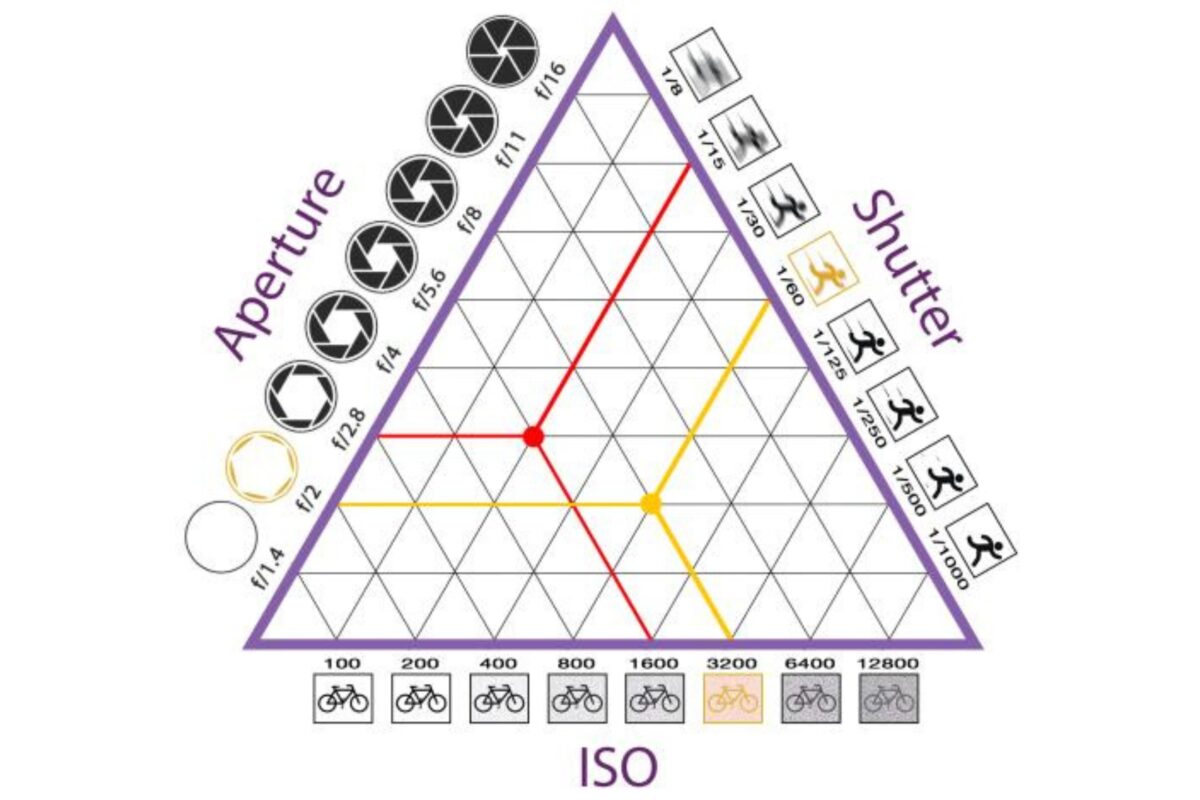
Incorporate exposure compensation when you’re comfortable with the basics to fine-tune your exposure. And don’t be afraid of a little trial and error.
Also, try using manual focus in a controlled environment to get a feel for sharp and soft focuses.
- Mix It Up: After individual practice with ISO, shutter speed, and aperture, challenge yourself to adjust all three for a perfect exposure balance.
Finally, I recommend keeping a notebook or using your camera’s display to record the combinations you’ve tried. This hands-on experience is your practical photography lesson, helping you to learn from what you see and feel.
Because no two lighting situations are the same. So the more you shoot, the better you’ll understand how to get the desired result in manual mode.
Combining Auto and Manual Modes
Blending automatic functions with manual controls can enhance both the technical quality and the artistry of your photos.
Using Auto Mode Features in Manual Mode
When diving into manual photography, it’s wise to ease the workload using some automatic features.
For instance, autofocus is invaluable for quickly locking onto your subject, ensuring sharpness without fidgeting with manual focus controls. especially when things are moving quickly.
Similarly, the camera’s auto white balance can take the guesswork out of color accuracy. And you can focus on more things like the composition or depth of field while still having control over other settings like the aperture and shutter speed.
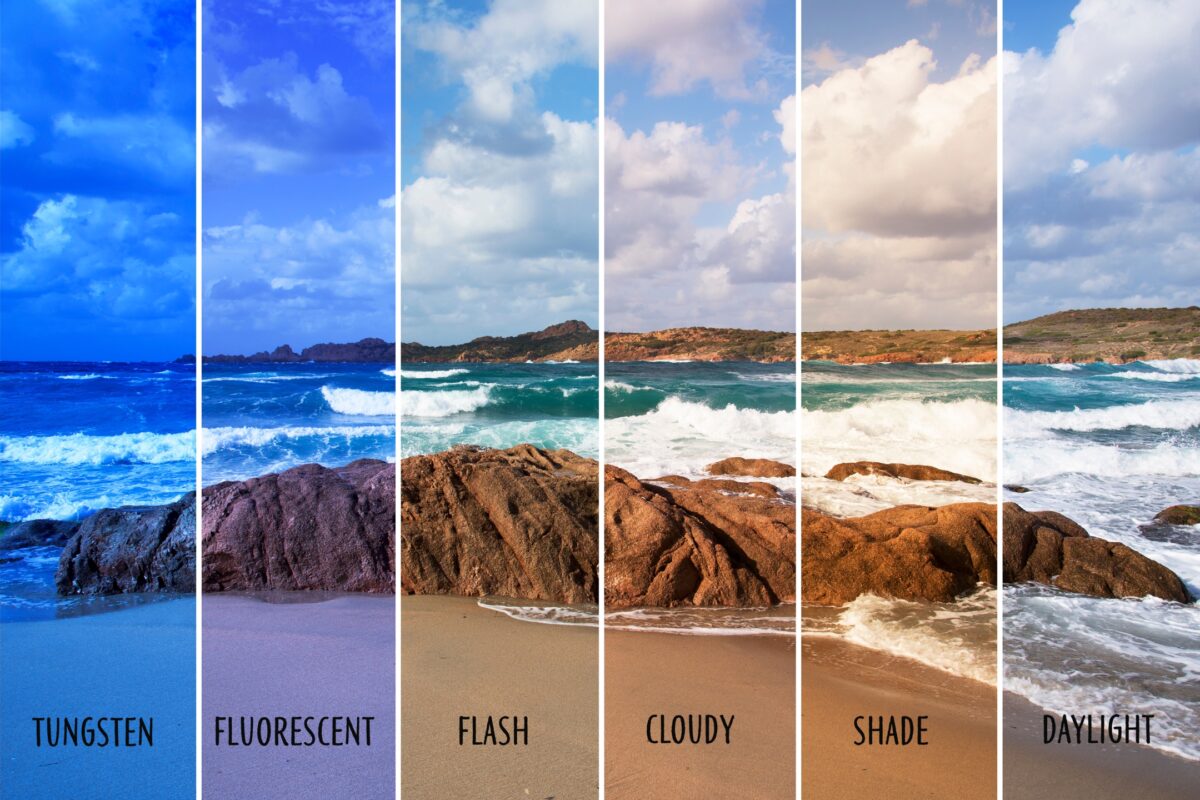
Balancing Auto and Manual for Best Results
Every scenario in photography is unique, and blending auto and manual modes can yield the best outcomes.
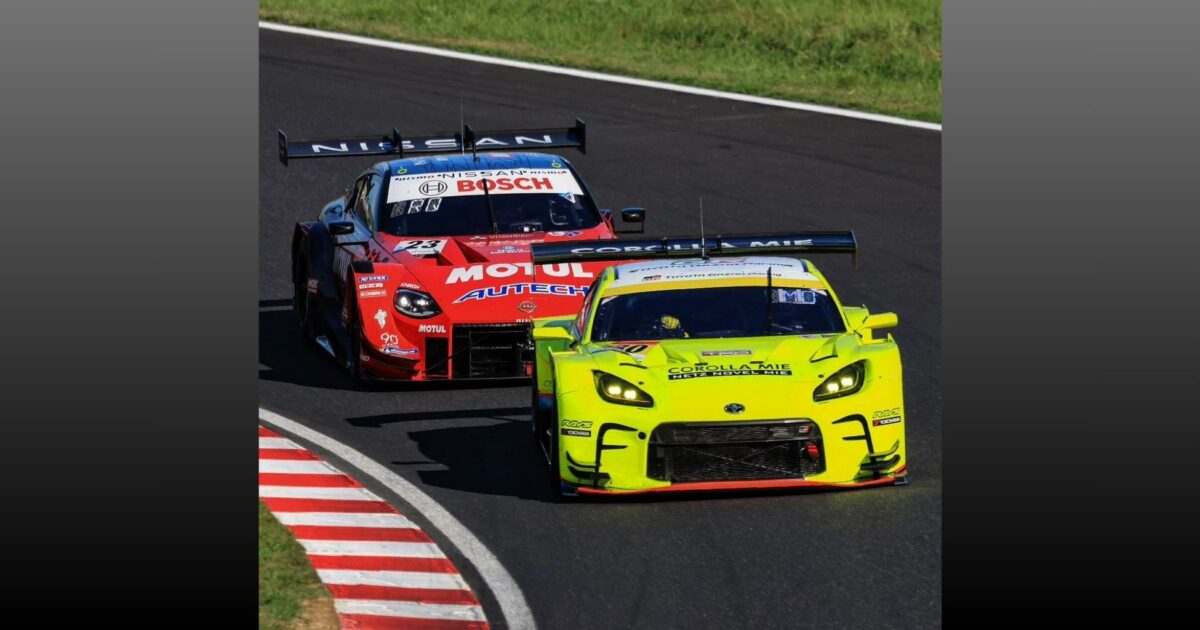
In a dynamic environment, like photographing a sports event, shutter priority mode lets you set a fast shutter speed to freeze action while the camera adjusts the aperture.
Versus in portrait photography, applying aperture priority mode permits you to determine the depth of field to keep attention on the subject as the camera selects the appropriate shutter speed.
In both cases, you retain partial control while letting the camera’s light meter analyze and adjust to the lighting patterns. This saves you time.
Real-Life Applications: Manual vs. Auto Mode Photography
Now, let’s break down when you might lean towards one mode over the other.
Indoor & Outdoor Scenarios: Making the Right Choice
Indoors, auto mode simplifies settings when lighting conditions are consistent. For instance, capturing portraits at a family event without worrying about the nuances of exposure settings.

Outdoors, it’s another game; landscapes benefit from manual mode when you’re aiming for specific effects – like a silky waterfall achieved with a slow shutter speed. Or the sharp capture of a fleeting expression in street photography, which might call for a fast shutter.
- Auto Mode Indoors: Great for quickly capturing sharp shots.
- Manual Mode Outdoors: Useful for creative adjustments in variable light.
Situations Where Manual Supersedes Auto and Vice Versa
Manual mode edges ahead for night photography. You control the exposure to prevent underexposed shots, which often happen in auto.
When shooting sports, auto mode can be a blessing for freezing action thanks to fast automatic shutter speed adjustments—moving objects won’t stand a chance of blur.
But if you’re after intentional motion blur to convey speed or flow, switching to manual to slow down the shutter speed might just do the trick.
And that’s all I have for auto vs. manual mode as a photographer.
If you want to learn more about using your camera so you can take high-quality images of people and places around you, join the waitlist for our upcoming course “Intro to Photography.”
It’s going to be awesome, and it’ll teach you the ins and outs of photography in a fun, easy-to-understand way.
Auto vs. Manual Mode Photography FAQs
Here are some of the most common questions regarding auto and manual mode settings on your camera.
What benefits do beginners gain by starting in automatic mode?
Automatic mode acts as a learning tool for beginners. It allows you to focus on framing and composition while the camera takes care of the technical aspects like exposure and focus. Think of it as the training wheels on a bike—providing support as you learn.
How do the results differ from auto mode to manual mode?
In auto mode, your camera dictates the settings based on sensors and algorithms, aiming for a balanced shot. However, this can limit creativity. Manual mode puts you in the driver’s seat, allowing you to tailor settings such as ISO, shutter speed, and aperture, potentially leading to more artistic and intentional results.
Do expert photographers shoot in auto mode, and if so, when?
Yes, professional photographers may switch to automatic mode. It’s convenient in rapidly changing conditions where getting the shot is more critical than painstakingly adjusting settings, such as during fast-paced sports or candid street photography.
What is bulb mode, and why is it important in photography?
Bulb mode is a setting that allows you to keep the shutter open for as long as you press the button, making it invaluable for long exposures. It’s perfect for capturing star trails or the smooth flow of waterfalls under the cover of night.
Can you explain aperture and how it affects your photos?
Aperture refers to the size of the opening in the lens through which light enters. It’s like the pupil of your camera’s eye, affecting field depth. A wide aperture (small f-number) creates a shallow focus, artistically blurring the background and making your subject pop.
What are the key advantages of shooting in manual mode for creative control?
Shooting in manual mode liberates your artistic expression, allowing you to craft an image precisely as you envisage. You can manipulate your story’s light, depth, and motion, from freezing a hummingbird’s wing in flight to blurring city lights into a luminous stream. It’s all about making your vision tangible.
