10 Excellent Lightroom Tools Every New Photographer Needs
As a photographer, you quickly discover the importance of post-processing.
The last step in the transformation of the photos you take.
And Adobe Lightroom is one of the best programs to use in your editing process. This program offers amazing tools that are designed to enhance and refine your pictures with precision and ease.
But before you get started using Lightroom, there are a few tools you should know about.
Lightroom’s Clarity Tool draws out textures and contrasts in your photo to make your images pop with depth. It’s like turning up the dial on reality, making the details you worked so hard to capture stand out.
Then there’s the Adjustment Brush that lets you pinpoint areas of your image for specific tweaks. With this tool, you can finesse light and shadow, and color and detail, exactly where it’s needed.
And with each adjustment, Lightroom’s non-destructive editing guarantees your original photos remain untouched.
It’s like having an infinite amount of undo’s at your disposal.
Now, let’s get to it and look at the other tools.
The 10 Lightroom Tools Every New Photographer Needs in Their Life
- Presets: Lightroom presets allow you to apply a set of adjustments to your image with just one click. They can be a huge time-saver and can also help maintain consistency across a series of photos. You can create your own presets or download those created by others.
- Adjustment Brush: This tool lets you make adjustments to specific areas of your photo. You can modify exposure, clarity, saturation, and more, all with precise control.
- Graduated and Radial Filters: These tools are perfect for making local adjustments that blend smoothly into the rest of the image. They are often used to darken skies (with a graduated filter) or to draw attention to a specific part of the image (with a radial filter).
- Spot Removal: The spot removal tool is excellent for cleaning up sensor dust or small blemishes on your photos. It can be set to ‘Clone’ or ‘Heal’ for different effects.
- Tone Curve: The Tone Curve allows for more advanced control over the tonality and contrast of your image. You can adjust the highlights, lights, darks, and shadows to fine-tune the look of your photo.
- HSL/Color Panel: The HSL (Hue, Saturation, Luminance) panel gives you control over the colors in your image. You can adjust the hue to change the color, the saturation to change the intensity of the color, and the luminance to change the brightness of the color.
- Detail Panel: This panel includes sharpening and noise reduction settings, which are essential for refining the look of your image, particularly if you’re shooting at high ISO settings or want to enhance fine details.
- Lens Corrections: Lightroom can automatically correct lens distortions such as vignetting, chromatic aberration, and geometric distortion based on the lens profile used when taking the photo.
- Before/After Tool: This feature allows you to view your original image side by side with the edited version, which is helpful to see the changes you’ve made and to ensure you’re not over-editing.
- History Panel: This tool is a lifesaver if you make a mistake or want to backtrack on your edits.
Understanding the Lightroom Workspace
Before going into the specifics of photo editing, I’d like to take some time to familiarize you with the environment where you’ll spend most of your time.
The Lightroom workspace is user-friendly and highly customizable. And it provides a seamless workflow whether you’re using Lightroom Classic or Lightroom CC.
Develop Module
The Develop Module is your creative hub in Adobe Lightroom. This is where your raw images transform into polished photos.
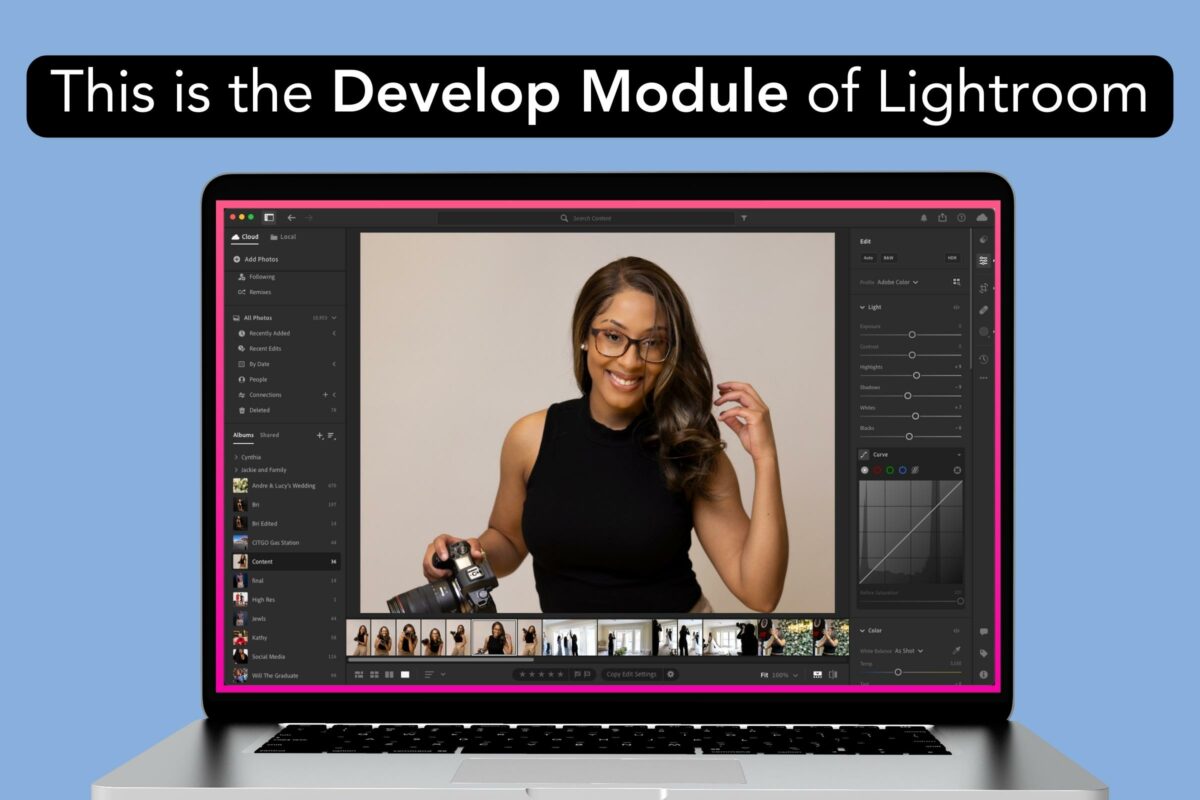
- Basic Adjustments: Tweak exposure, contrast, and color saturation with sliders that have a real-time impact on your image.
- Tone Curve: Sculpt light and dark regions for more dramatic effects.
- Detail Panel: Offers sharpening and noise reduction capabilities to enhance image clarity.
Tip: When using the Clarity Tool, remember that it globally affects your image, enhancing textures and contrasts—ideal for adding depth to landscapes.
Library and Organizing Photos
In Lightroom, your workflow begins with the Library.
This is where you can organize, tag, and manage your photos efficiently.
- Importing: Hit the ‘Import’ button to start adding your images to Lightroom.
- Folders and Collections: Create a systematic structure by using folders for broad categories and collections for specific projects or themes.
Also, in both Lightroom Classic and Lightroom CC, you can customize your workspace to hide panels you don’t use, keeping your work area clutter-free and focused on your needs.
Getting Started with Editing
Now, let’s explore photo editing in Lightroom! Here, you’ll learn how to bring your digital photos from raw potential to polished perfection.
Importing Images
First things first, you need to get your photos into the program. Lightroom supports a range of file formats including RAW files, JPEG, and TIFF.
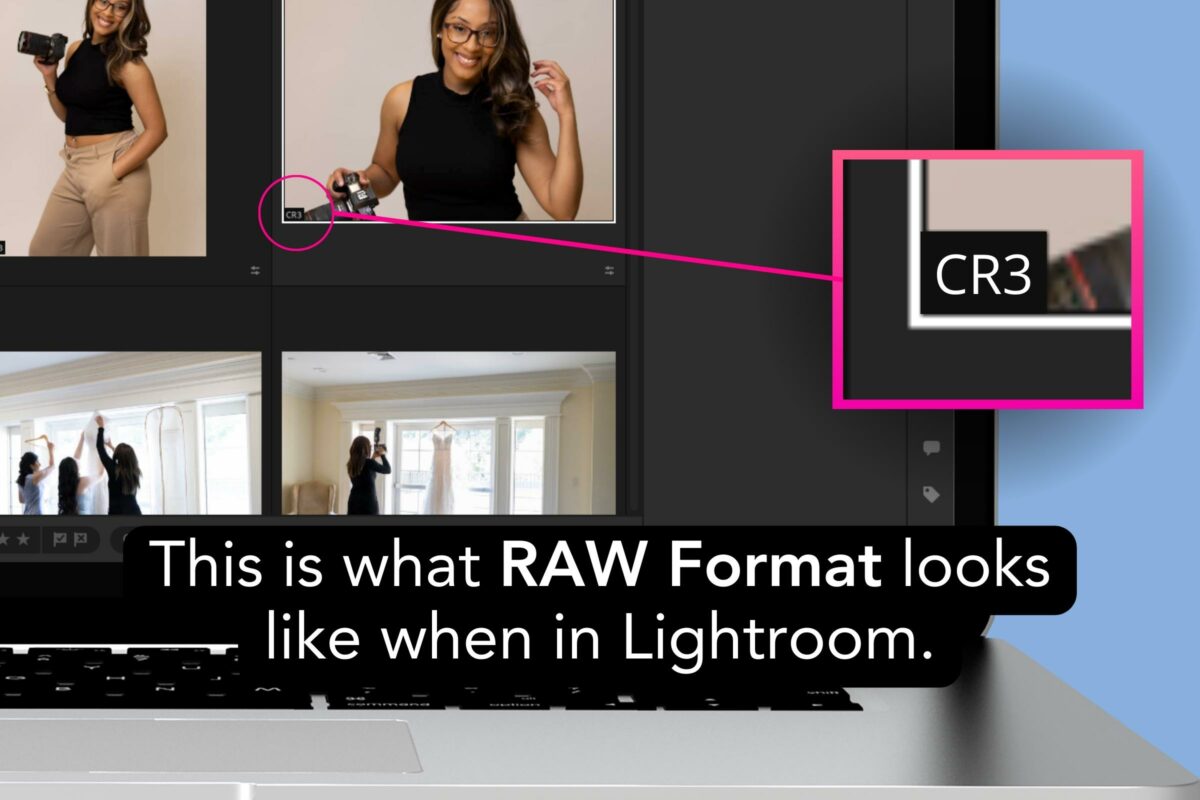
- Start by clicking the ‘Import’ button in the Library module.
- Choose the source location and select the images you wish to import.
Basic Adjustments
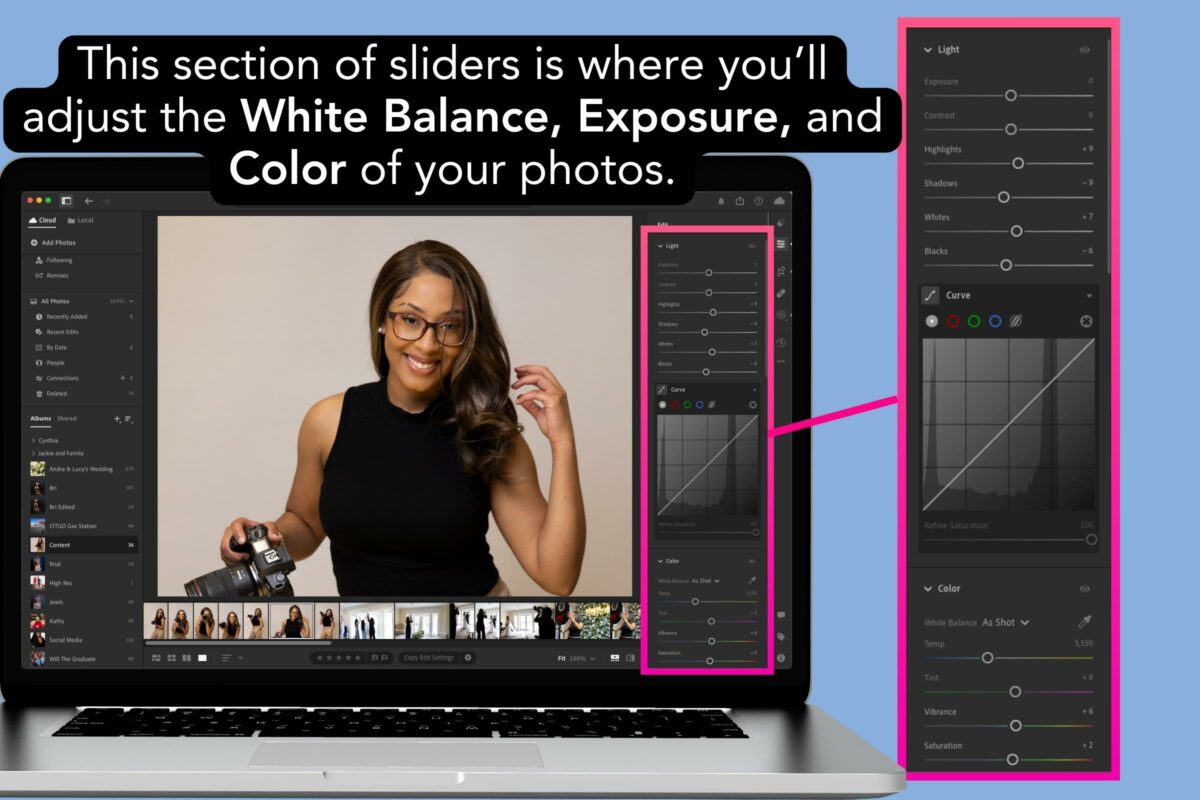
Once your images are comfortably settled in, it’s time to make them shine with the Basic panel. This is your ‘control center’ for adjustments like exposure, contrast, and color balance.
- Adjust Exposure to control the overall brightness.
- Contrast can add punch to your images, making them pop.
- Fine-tune highlights and shadows to reveal hidden details.
Experiment with the sliders here to see real-time changes to your photo.
Exporting Your Work
After all the tweaks and enhancements, it’s showtime – you need to export your work. This is like giving your photos their passport to the world.
- Click the ‘Export’ button to choose your export settings.
- File Format: Pick between JPEG, TIFF, and more depending on where your image is headed.
If you’re looking for a free alternative to Lightroom, consider programs like Darktable or RawTherapee, although they might have a steeper learning curve.
Then, have fun playing with these tools and watch as your images transform!
Lightroom Tools for Mastering Light and Color
Light and color are the heartbeats of photography.
Using Lightroom’s light and color tools will make your photos more emotional and impactful. Let’s go over the tools you need to do just that.
White Balance
White balance sets the stage for color accuracy in your photos. By adjusting the white balance, you tell Lightroom what should be pure white, eliminating unwanted color casts.
- Temp slider: Adjusts the warmth or coolness.
- Tint slider: Balances the green or magenta tones.
Tip: Use a known neutral reference in the image or the dropper tool for precision.
Exposure and Contrast
Exposure defines the overall brightness, while contrast is about the difference between the lights and darks.
- Exposure slider: Manage the brightness to reveal your subject’s details.
- Contrast slider: Increase to distinguish lights and darks or decrease to flatten the image.
Details are key when working in Lightroom so try to avoid clipping shadows and blowing out highlights.
Saturation and Vibrance
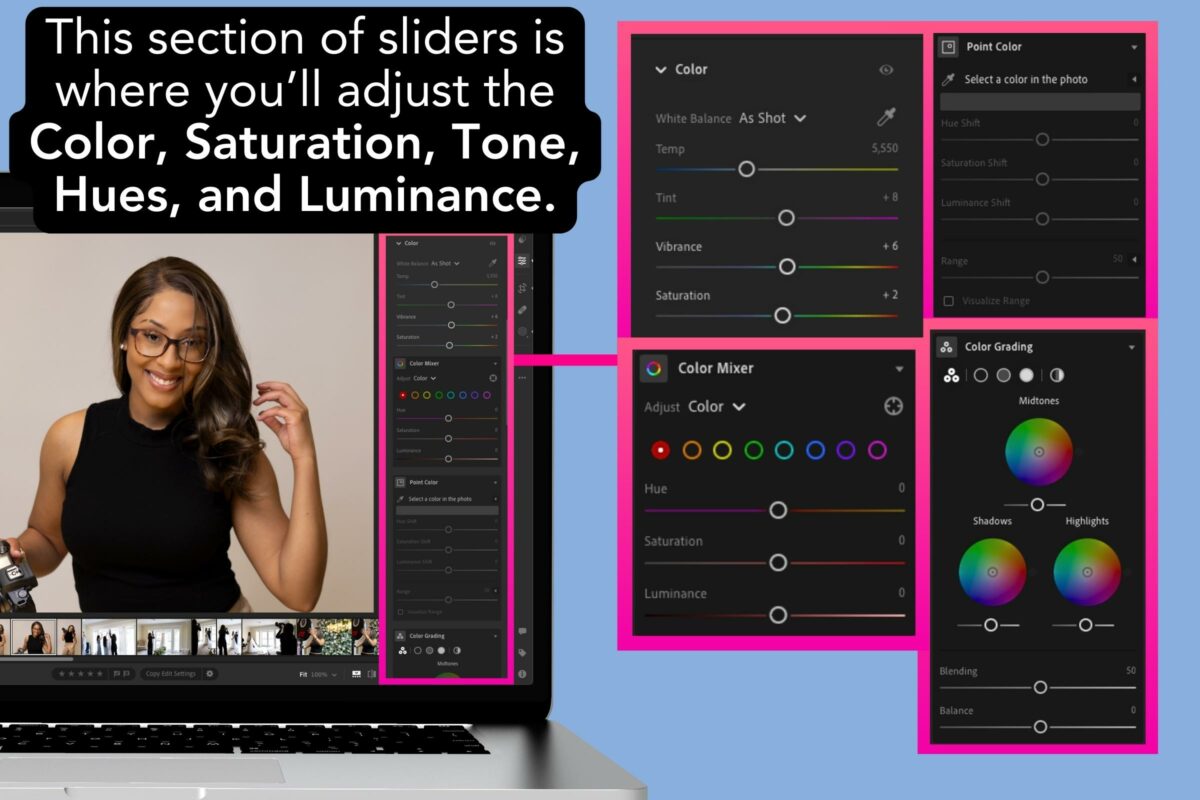
Saturation and vibrance control the intensity and subtlety of colors in your images.
- Saturation slider: Affect all colors uniformly, increasing their intensity.
- Vibrance slider: Smartly boosts the muted colors without oversaturating skin tones.
Use vibrance for a slight improvement without changing natural-looking skin.
Tone Curve
The tone curve is a powerful tool for fine-tuning the exposure and contrast in shadows, midtones, and highlights.
- Manipulate points along the curve to adjust sections of the tonal range.
- The S-curve is popular for adding depth and a touch of drama to your photos.
Learning about the curve helps you make precise changes to the tones in your photos.
HSL Sliders
HSL stands for Hue, Saturation, and Luminance, and these sliders tweak individual color channels.
- Hue slider: Alters the shade of a specific color.
- Saturation within HSL: Adjusts the color intensity independently.
- Luminance slider: Affects the brightness of each color.
Tackle color imbalances by adjusting each color without altering the entire image. HSL tuning is key for targeted color correction.
Advanced Editing Techniques
Unlocking the full potential of Lightroom starts with learning advanced editing techniques that give you precise control over every aspect of your image.
Whether it’s bringing out the finest details or applying targeted color enhancements, these tools are like a craftsman’s set of brushes, each designed to refine and perfect your photographs.
Local Adjustments
When you want to draw attention to certain parts of your photo or adjust areas independently, local adjustments are your go-to tools.
With the Adjustment Brush, you can paint adjustments onto any area of your image. Imagine you’re an artist highlighting or shading only where needed.
You can affect exposure, contrast, and more. Remember to use the brush’s settings to control the feather and flow for a seamless blend with the surrounding pixels.
- Key Tools:
- Adjustment Brush
- Gradient Filter
- Radial Filter
Advanced Color Grading
Color grading in Lightroom can transform the mood and atmosphere of your photos.
It’s like adding a layer of emotion on top of your image. Use the Color Grading panel to adjust the hues and tones in the shadows, midtones, and highlights.
The goal is to achieve a harmonious color balance that complements your subject. Adjust the saturation and luminance sliders to tweak the intensity and brightness of colors.
- Key Areas:
- Shadows
- Midtones
- Highlights
Details and Texture Enhancements
Improve the texture and clarity of your images to give them a more tactile feeling.
The Texture Slider is a subtle but effective tool to bring out patterns and fine details without affecting the overall sharpness. For a more robust effect, the Clarity Tool will add midtone contrast, making your photo pop.
And remember, like adding spices to a meal, these adjustments should be made with a gentle hand to avoid overdoing it.
- Detail Tools:
- Texture Slider
- Sharpening
- Clarity Tool
- Dehaze Slider
Integrating these advanced tools into your Lightroom workflow will give you the artistic flexibility to elevate your images from good to great.
Using Lightroom’s Powerful Tools
Lightroom presents a suite of tools that transform your photos from good to spectacular through advanced edits.
Tap into granular control over your images with filters and brushes designed for precision.
Graduated and Radial Filters
Imagine you’re painting with light.
The Graduated Filter is your broad brushstroke across a sunrise sky, toning colors and balancing exposure seamlessly from one end to the other.
The Radial Filter circles your subject, creating a vignette or highlighting areas like a spotlight.
Both tools enable you to apply adjustments within a defined linear or radial area, giving you the ability to affect the mood without influencing the entire image.
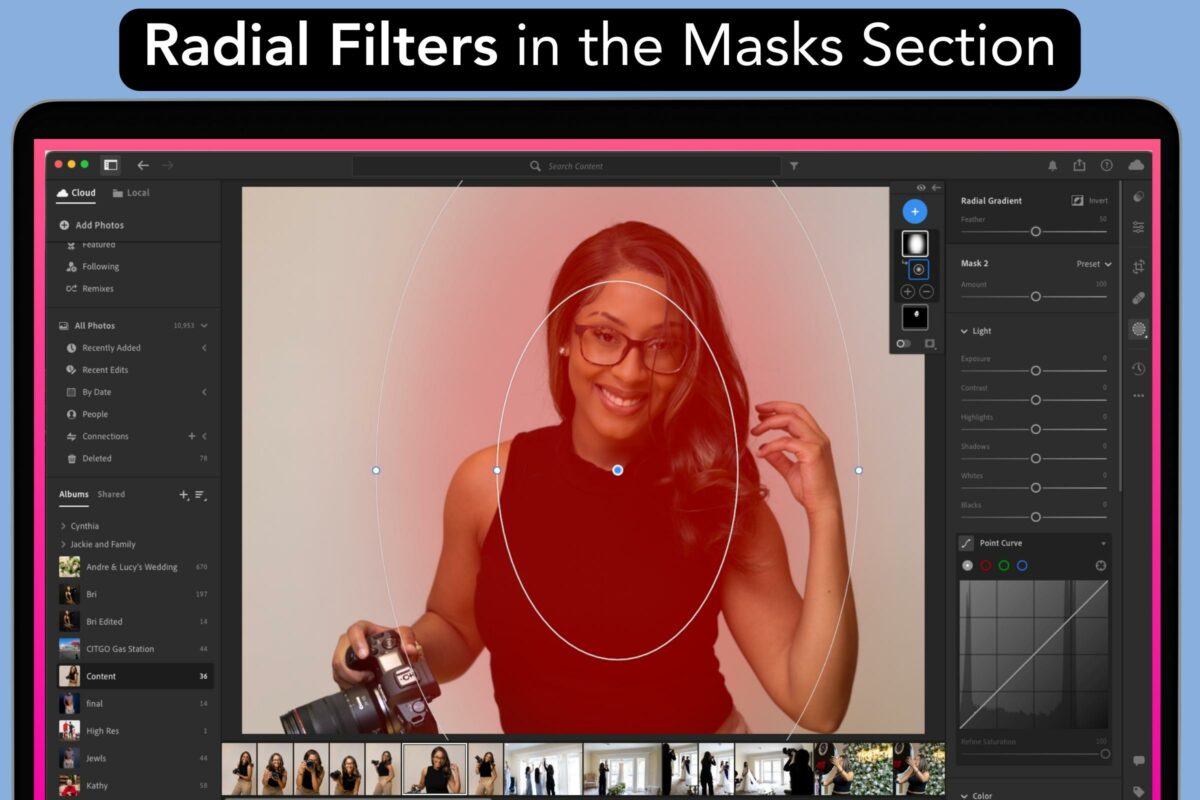
- Graduated Filter: Helps balance exposure across an image—great for skies that are too bright or landscapes that need a pop.
- Radial Filter: Highlights a focal point or adds vignettes, focusing the viewer’s attention where you want it.
Tip: Think of these filters as a means to direct your viewer’s gaze to the narrative you want to tell in your photo.
Adjustment Brushes
The Adjustment Brush is your detail-oriented tool.
It lets you make adjustments exactly where you desire. Whether you’re brightening eyes, improving textures, or reducing noise, the brush gives you meticulous control.
With Auto Mask, you can ensure that your brush strokes only affect the desired area based on the colors and tones where you first click.
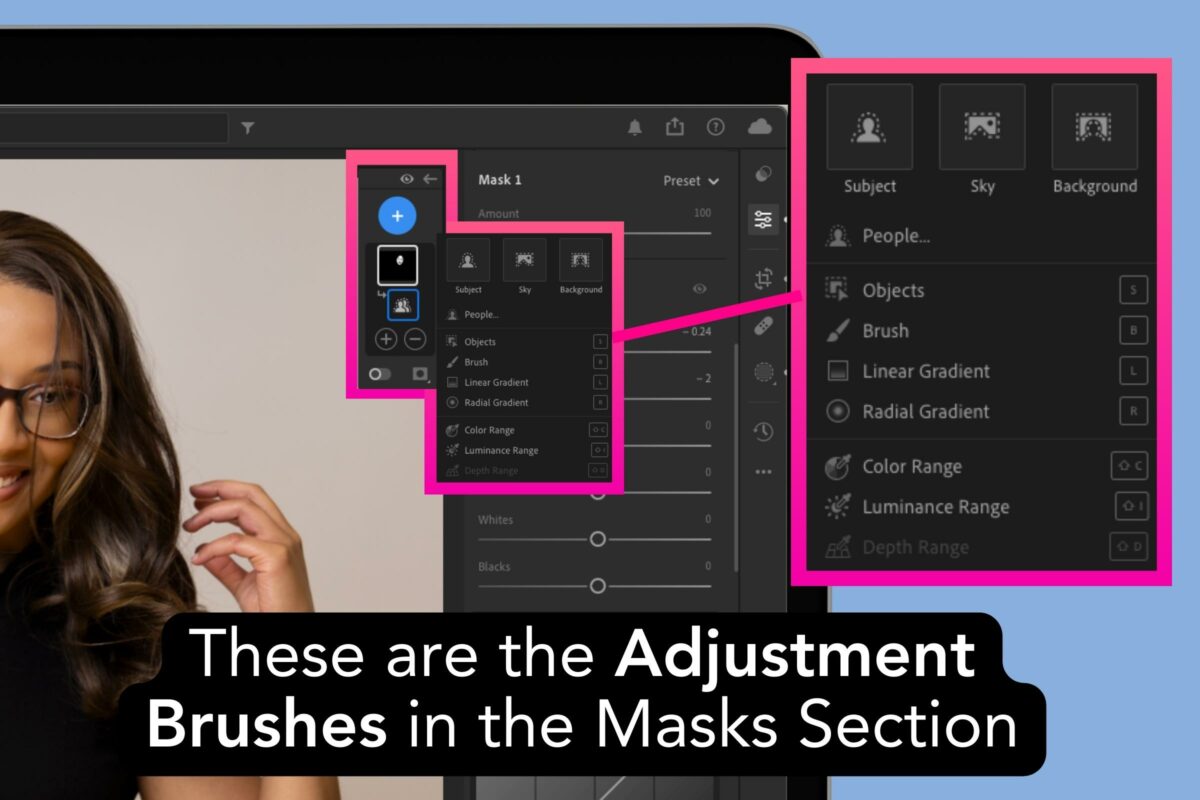
- Auto Mask: Automatically detects and applies the brush stroke to similar tones and colors
- Edit Brush: Use this to refine the area affected by filters or other adjustment brushes.
Adjustment Brushes make your photos jump off the page with depth and precision.
Masking Options
Masking in Lightroom takes filtering and brushing to new heights.
The latest Masking Options allow you to combine different masks—like Graduated Filters, Radial Filters, and Adjustment Brushes—to sculpt light and color with unparalleled detail.
You can add layers of masks to build complex edits or use a Subtract Mask to remove the effect from parts of your image.
- Filter Mask: Apply targeted adjustments to your image with precision.
- Subtract Mask: Use this to delineate areas that should be excluded from your edits.
Each masking tool you use is a step towards turning your image into a masterpiece. And, with the power of these masks, nuances in your photo can be enhanced or toned down according to your creative vision.
Creating and Managing Presets
When working in Lightroom, presets become your best friends.
They not only save time but also bring a consistent look to your photography business. Let’s learn how to use them effectively.
Saving Custom Looks
Imagine you’ve spent hours finding the perfect adjustments for your photo.
With Lightroom, you can save these settings as a Preset to apply that same magic to any photo with just one click.
To create a preset, adjust your photo to your liking, go to the Presets panel, click the Plus (+) icon, and select Create Preset.
Name your preset and select which adjustments to include. It’s like bottling your creativity for future use.
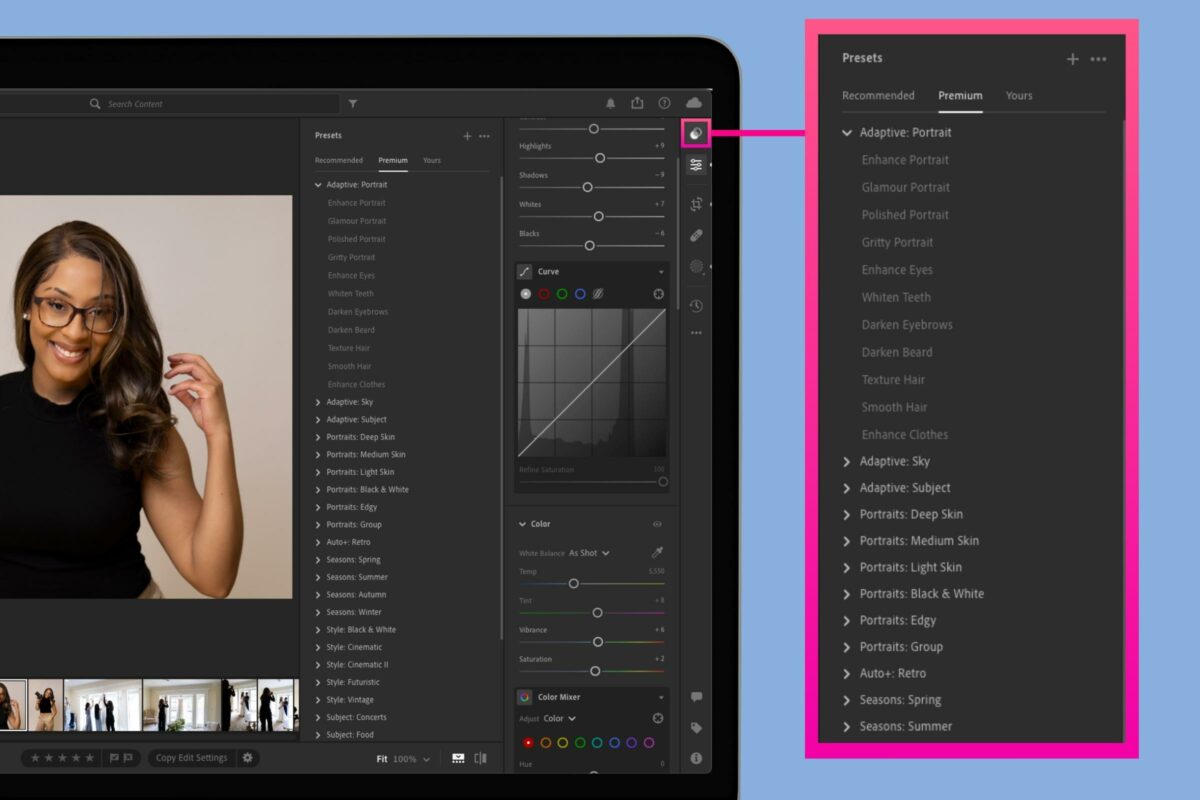
- Steps to Save a Preset:
- Make your photo edits.
- Go to the Presets panel.
- Click the Plus icon (+).
- Select “Create Preset”.
- Name your preset.
- Choose adjustments to save.
Batch Editing with Presets

Picture this – You’ve just returned from a shoot with hundreds of photos. They all need editing.
Don’t worry. Batch editing with presets is your lifeline.
You can apply a preset to multiple photos by selecting them in the Library module and syncing your settings.
This ensures a uniform style across your entire collection and shifts hours of work into a mere moment.
- How to Batch Edit Photos:
- Select photos in the Library module.
- Apply your chosen preset.
- Sync settings across all the selected photos.
This method is loved by professional photographers who value efficiency and style consistency.
Lightroom Presets Marketplace
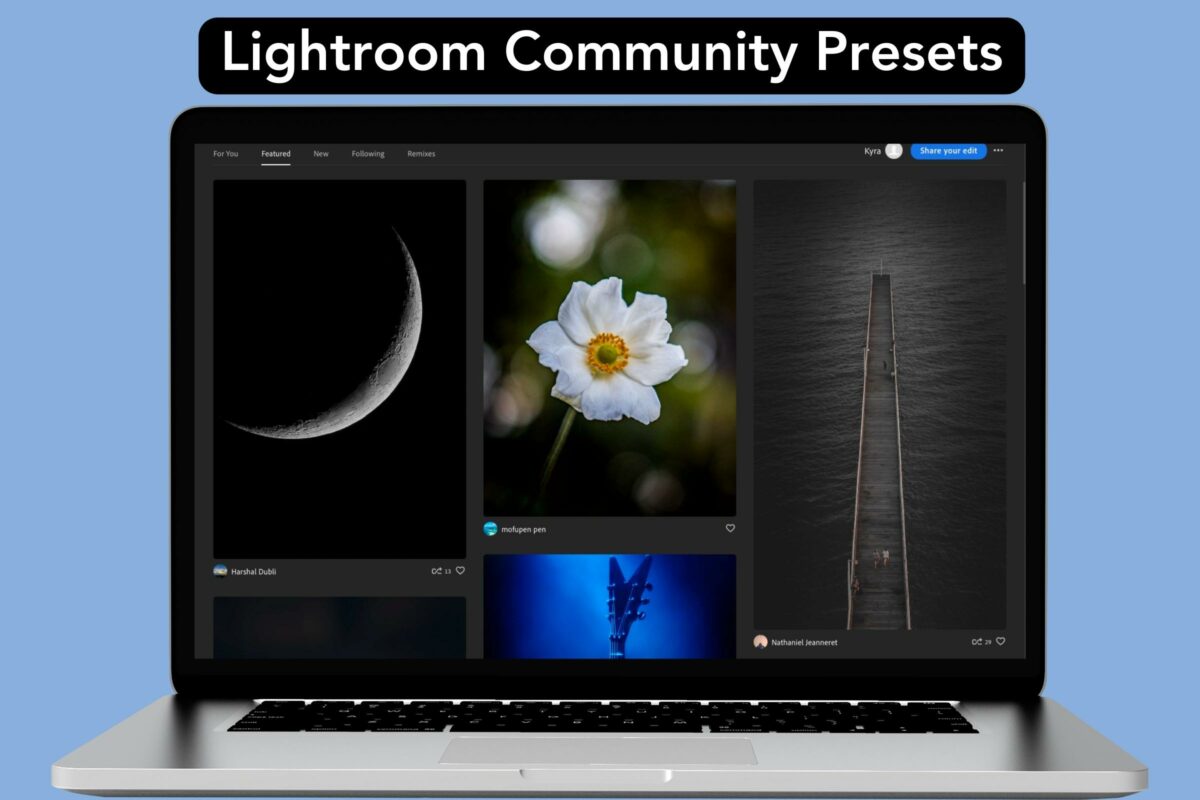
Your unique style might need a jump-start, or perhaps you’re looking to explore new looks.
This is where the Presets marketplace steps in.
Brands like Mastin Labs, RNI, and Ilford offer presets that emulate classic film looks. These markets enable you to quickly elevate your photos with professionally designed presets that can serve as a starting point or final touch for your images.
- Popular Presets Providers:
- Mastin Labs: Known for their film emulation presets.
- RNI: Offers a variety of color and black and white presets.
- Ilford: Famous for their timeless black and white looks.
So, whether you’re a professional or just starting out, explore the presets market for fresh inspiration and new ways to streamline your workflow.
Frequently Asked Questions
What are the key tools in Lightroom for beginners?
When you’re starting out, mastering tools like the Presets for quick edits, the Crop tool to frame your shots just right, and the Adjustments Brush for detailed tweaks are your go-to essentials. They allow you to make significant improvements to your photos with relative ease.
How can new photographers maximize their use of Lightroom?
To really get the most out of Lightroom, spend time learning about the Histogram to understand exposure, and don’t shy away from experimenting with the HSL/Color panel to bring out the best in your images. These areas can transform your photos from good to great.
What are some must-know Lightroom features for photo editing?
You should get familiar with the Healing Brush for removing blemishes, and Graduated and Radial Filters for applying graduated effects on your images. Also, the powerful AI Masking tool opens up possibilities for targeted adjustments without affecting the whole photo.
Where can I download essential Lightroom tools?
Adobe Lightroom can be downloaded from the Adobe website. However, for additional presets or plugins, you can browse the Adobe Exchange or trusted third-party providers. Ensure any downloads are compatible with your version of Lightroom.
How do professionals decide between Lightroom CC and Lightroom Classic?
Pros consider their workflow needs when choosing. Lightroom CC offers cloud-based storage and accessibility on multiple devices, making it ideal for on-the-go editing. Lightroom Classic, on the other hand, provides a more comprehensive set of tools and is preferred for desktop editing.
Which version of Lightroom is recommended for new photographers?
For starters, Lightroom CC is intuitive and user-friendly, perfect for getting your feet wet with photo editing and managing a smaller image library. Once you’re ready to dive deeper into editing and organizing your work, you can explore the advanced features of Lightroom Classic.


