10 Steps to Photography: A How to Guide for Beginners
Getting into photography after finding your favorite muse is exciting!
Whether that’s portrait, landscape, macro, street, black and white, or any other genre of photography.
As soon as you start your learning journey, you’re on an uphill journey to surpass the beginner phase and become a professional photographer.
To get you to the advanced level of photography, you should know the basics of photography and become a master of them.
So, in this article, we’ll go over 10 steps to photography for beginners.
These are photography tips that’ll help you develop your photographic eye and grow as a new photographer.
My first suggestion after reading this (and any other educational videos or articles) is to become acquainted with your digital camera. Practice what you’ve learned as soon as possible while the information is fresh in your head.
Alright, let’s go over the basic photography tips every photographer should know as a beginner.
1. Master Your Camera’s Manual Mode for Quality Shots
Mastering manual mode is the first photography tip I want to share so you can produce high-quality shots.
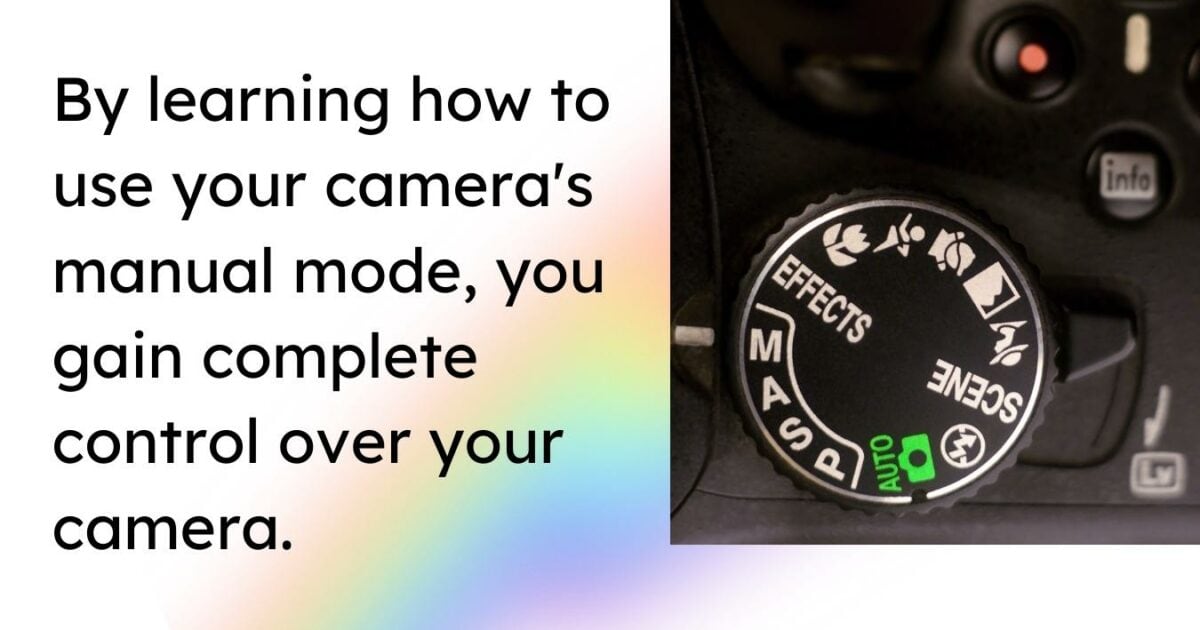
Because it gives you total creative control over your photos. If you practice and understand it, manually shooting can transform your photos into works of art.
Why You Should Learn How to Take Photos Manually
Manual mode is required to unlock the full potential of DSLR cameras and take high-quality shots.
This allows you to adjust the three key exposure variables independently.
Which are aperture, shutter speed, and ISO. Manual photography also allows you to adjust the exposure triangle for better results in any lighting situation. Even low light!
4 Steps You Can Take to Master Manual Mode
Understand The Exposure Triangle: The exposure triangle includes aperture, shutter speed, and ISO. These settings work together to control the amount of light entering the camera and reaching the sensor.
You get a well-balanced exposure by adjusting these elements, resulting in a photograph that is neither too bright nor too dark.Aperture controls the size of the opening in the lens, which determines how much light enters the camera. A larger aperture (smaller f-number) allows more light to pass through the lens, resulting in a shallower depth of field. While a smaller aperture (larger f-number) lets in less light and produces a deeper depth of field.
Shutter Speed dictates the length of time the camera’s sensor is exposed to light. Faster shutter speeds (like 1/1000 of a second) freeze motion and reduce the chance of motion blur. While slower speeds (like 1/15 of a second) allow more light to enter the camera and cause intentional motion blur or light trails.
ISO affects the sensitivity of your camera sensor to light. A lower ISO (like 100) means the sensor is less sensitive, resulting in less noise and a cleaner image but requiring more light. A higher ISO (like 3200) increases sensitivity, allowing you to shoot in lower light but at the expense of too much noise in your image.
Experiment With Different Settings: Observe how the changes affect your photographs as you adjust each exposure variable. This process will help you understand the relationship between aperture, shutter speed, and ISO.
Practice in Various Lighting Conditions: Try shooting in different lighting conditions to learn how manual shooting can help in different shooting scenarios.
Study Your Camera’s Functionality: Familiarize yourself with your specific DSLR camera brand and its features. Different cameras may have unique functions or layouts, so consulting your manual and exploring your camera’s settings will help you master manual shooting efficiently.
2. Understand Basic Composition and Use Your Judgement
For this next photography tip, we’ll discuss basic photo composition techniques and why you should use your judgment when taking photos.
The Basics of Composition
In photography, composition is a crucial element that determines your photos’ visual impact and storytelling.
Let’s familiarize you with some basic composition techniques to improve your photographs.
One fundamental technique is the rule of thirds, which involves dividing your frame into a 3×3 grid and placing your subject along the lines. Or at the intersection points.

This strategy helps create more balanced and visually appealing photographs.
Another essential composition technique is using leading lines to direct the viewer’s eye. You can use various lines like diagonals, curves, or environmental patterns to guide the viewer through your image.
Also, symmetry is a powerful composition tool that can create a sense of harmony and balance in your photos. Look for symmetrical elements in your scene and compose your shot to highlight this symmetry.
And finally, we have the rule of odds.
This suggests that an odd number of subjects in a frame can create a more pleasing image composition than an even number. Because the imbalance caused by the odd number of subjects attracts the viewer’s attention and adds interest to the image.
When to Forget the Rules and Trust Your Eye Instead
While these basic techniques can significantly enhance your photos, let’s not forget rules can be broken.
When you’re learning photography, the most important photography tip I can give you is to trust your judgment and develop your unique style.
There will be instances when following the conventional composition rules might not work for your image, and it’s okay to abandon them.
Pay attention to what looks visually appealing to you, and dare to experiment with unconventional compositions. Trust your instincts.
Then, break standard photography rules.
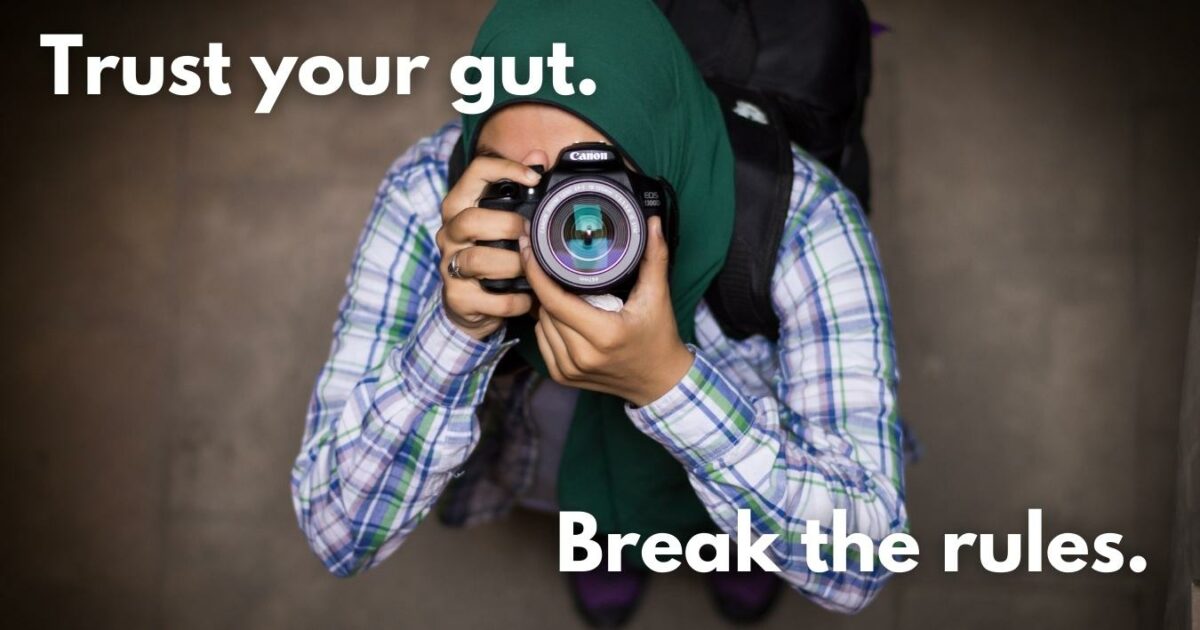
Understanding basic composition techniques like the rule of thirds, leading lines, symmetry, and the rule of odds is essential to improve your photography skills.
But break away from these rules and trust your eye whenever it feels right because you need to always be open to experimentation and growth as a photographer.
3. Use Natural Light and Avoid Using On-Camera Flash
One of the main things that makes a photo look “good” is the lighting. And one of the best ways to get good lighting is to use natural light instead of the camera’s built-in flash.

Why You Should Avoid On-Camera Flash
On-camera flash can sometimes create harsh shadows and unflattering lighting.
By using mostly natural light, you’ll get much more natural-looking photos. Natural light creates a soft and even illumination in your pictures, highlighting the details and bringing out the best in your subjects.
Becoming skilled at using and manipulating natural light will improve the quality of your photography.
Lighting Photography Tips for Beginners
Since using natural light effectively is essential for achieving better photos. Here are some lighting techniques you can consider:
Front-Lighting: Positioning your subject with the light source directly in front of or behind them can bring out rich colors and create minimal shadows. This results in an evenly-lit, well-defined photograph.
Side-Lighting: Position your subject with the light source to their left or right to create contrast within your image. This technique can emphasize textures and add depth to your photos by creating more visually dynamic shadows.
Backlighting: Positioning the light source behind your subject can create beautiful silhouettes and highlight outlines. It can evoke a dramatic feel and create a stunning visual impact.
Try experimenting with different angles, positions, and times of day to discover how natural light can work best for your images.
4. Try New Things and Photograph Multiple Angles When Shooting
Trying different techniques and being creative can help you find your shooting style and capture amazing photos.
The Importance of Perspective in Photography
In photography, perspective matters.
It shapes how an image is perceived, allowing you to convey different emotions and stories through your work.
You’ll create distinctive, engaging images that stand out by experimenting with new perspectives. Embrace trying unusual angles and viewpoints. Doing so will ultimately lead to more captivating photography.
Don’t feel confined to capturing only what’s common or familiar.
Instead, seek a fresh perspective by moving around the subject, getting close or far away, or even going above or below. These adjustments will give you a greater range of shots to display your creativity and expertise.
Tips for Finding New Angles and Perspectives
Shoot From Various Heights: Changing the height at which you shoot can offer a fresh perspective. For example, using a bird’s-eye view or a high angle can make your subject appear vulnerable and give the viewer a sense of dominance. Alternatively, shooting from a low angle can make your subject seem powerful and imposing.
Look for Reflections: Water, glass, and other reflective surfaces can introduce a unique perspective to your photos. Objects may appear distorted or abstract, making the viewer evaluate the photo more deeply and creating intrigue. Experiment with capturing reflections to add depth and dimension to your photos.
Incorporate Leading Lines: Using lines in your composition will draw viewers’ eyes to the image and guide them to a specific subject or focal point. Leading lines can create a sense of direction, order, and connectivity within the image. So, look for elements in your environment that can serve as leading lines, whether natural or not.
Get Close Up and Use a Shallow Depth of Field: By getting closer to your subject and using a shallow depth of field, you can isolate them and create a more intimate perspective. This approach can also highlight details that may otherwise be overlooked. Experiment with different degrees of closeness to find the perfect balance of intimacy and clarity for your image.
Remember, experimenting with new angles and perspectives when taking pictures is key if you want to draw attention to your photos.
And push yourself to try new things. You’ll learn new and exciting things and enjoy photography more.
5. Move Your Feet and Take Your Time During Photoshoots
One of the most important aspects of photography is movement.
Walking around, finding different angles, and exploring your subject all add up to create dynamic images. And while it might seem like a pain to move all the time, it’s one of the best parts of photography!
The Benefits of Physical Zooming
One of the most important aspects of photography is mastering the art of moving your feet and taking your time during photoshoots.
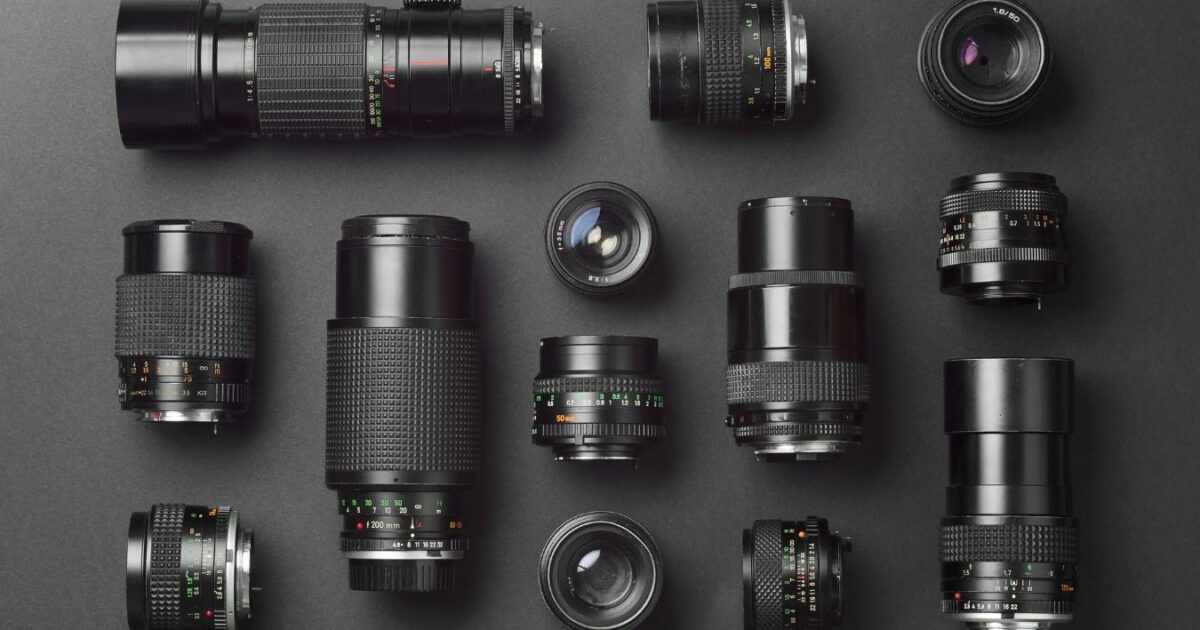
Moving closer or further from the subject is useful if you don’t have a zoom lens or like using prime lenses.
And by moving around, you can take advantage of the different focal length perspectives offered by various lenses. For example, wide-angle, standard, or telephoto lenses.
Taking your time during a shoot allows you to analyze your composition and perspective thoroughly. You also get to balance every detail and position the camera correctly and how you want before taking the photo.
Attention to detail also helps you think about lighting, leading lines, and the background when taking photos.
Why You Should Get Closer and Further From Your Subject Without Using Your Camera’s Zoom
Yes, using a zoom lens is convenient.
However, several reasons exist for getting closer to or further from your subject without relying on your camera’s zoom function.
First, prime lenses, which have a fixed focal length, typically deliver better image quality and sharpness compared to some zoom lenses. Using prime lenses and physically moving can maintain that image quality while adjusting your perspective.
Plus, when you physically move closer to or further from your subject instead of using a zoom lens, you can change the relationship between your subject and the background.
This can result in unique and interesting compositions that would otherwise be hard to achieve solely through focal lengths.
And changing distance and perspective can illustrate different parts of your subject.
So, the next time you embark on a photoshoot, remember to move your feet, take your time, and try different distances and perspectives.
6. Keep The Background of Your Photos in Mind for Clearer Photos
Even with everything we’ve covered so far, getting the composition of your photos right can still be challenging.
It doesn’t matter if you’re using a DSLR, mirrorless camera, or point-and-shoot camera; a big part of getting your composition right is paying attention to the background of your shots.

The Role of Backgrounds in Photography
Backgrounds add context to your pictures and help tell the story of your photo.
A clean and non-distracting background allows the viewer to focus on the subject. Whereas a cluttered or confusing background can detract from the final image.
So, pay attention to your backgrounds when taking pictures.
Basic Photography Tips for Cleaning Up Your Background Before Taking Your Picture
Choose The Right Location: Select a location where your subject stands out against the background, and there are minimal distractions. And don’t hesitate to reposition your subject or change your shooting angle to get a cleaner background.
Use a Shallow Depth of Field: Shooting with a wide aperture (e.g., f/2.8) and longer focal length can help blur the background. It also emphasizes your subject and reduces distractions.
Frame Your Subject: Use elements in your environment—for example, trees or architecture to frame your subject and naturally separate them from the background.
Keep an Eye on Colors and Patterns: Make sure the background colors and patterns don’t clash with your subject’s appearance. Look for backgrounds that complement your subject and make them stand out.
Control The Light: Experiment with different lighting techniques to minimize harsh shadows or unwanted reflections on the background. Diffused lighting or natural light sources, such as windows, golden hour, or an open shade, can help create a more pleasing background and sharp images.
Post-Processing of Images: If necessary, use post-processing photo editing software. Most photographers use Photoshop or Lightroom to clean up the background in their photos. You can remove distractions, adjust colors, or even blur the background further to enhance the overall composition. But remember, the goal is to create a clean, non-distracting background that allows the viewer to focus on your subject.
7. Frame Your Subject for More Impactful Pictures
To frame good photos, you must choose what to include and leave out. You can create more impactful and interesting pictures by carefully framing your subject.
What is Framing in Photography?
Framing in photography refers to using elements within your scene to create a frame around the subject of your photo.
This draws the viewer’s attention and gives the photograph a more artistic feel. Using framing effectively can enhance the visual impact and composition of your images.
How to Frame Your Subjects Effectively
Rule of Thirds: This fundamental technique involves dividing your image into a 3×3 grid. Place your subject at the intersection of the grid lines to create a striking composition and balance within the frame.
Rule of Odds: Compose your shot with an odd number of subjects, typically creating a more dynamic and interesting visual effect.
Use Leading Lines: Guide your viewer’s eyes to your main subject by utilizing the lines within your scene, like roads, fences, or even shadows. These lines act as natural guidance towards your subject, adding depth to your photograph.
Look for Natural Frames: Be on the lookout for elements in your environment that can naturally frame your subject, such as doorways, windows, or trees. This not only emphasizes your subject but also adds context to your image.
Experiment With Angles: Vary your shooting angles to discover unique framing opportunities. A new perspective can make your photos more interesting.
Combine Framing Techniques: Avoid combining different framing methods to create more intricate and visually engaging photos. Mixing the rule of thirds, the rule of odds, or using lines can produce powerful compositions.
Framing as a photographer can significantly elevate photo quality and the impact your pictures have.
8. Mastering White Balance Right for Accurate Photo Colors
White balance is one of the most important settings on your camera, yet it’s also one of the most misunderstood.

Understanding White Balance in Photography
White balance is important in photography because it ensures accurate colors are present in your images.
In simple terms, white balance is your camera’s attempt to understand the color of the light and make sure the white parts appear white. Not tinted with orange, blue, or green colors.
This camera setting compensates for the color temperature of the light illuminating your subject.
Your camera is good at reproducing colors (most cameras). Our cameras analyze the scene and compensate for overly warm or cool colors.
But, as a new photographer, you need to learn white balance to capture sharp photos and get more accurate and true-to-life colors in your photos.
Tips for Adjusting White Balance
Know Your Camera’s White Balance Settings: Familiarize yourself with your camera’s white balance settings and icons. These icons represent different lighting situations, such as sunlight, cloud, shade, and flash. Using the right setting based on your current lighting situation helps ensure correct colors in your photos.
Auto White Balance (AWB): Most digital cameras have an AWB mode that adjusts the white balance automatically. While this can be a helpful starting point, it might not always give the best results, especially in low light or tricky lighting situations.
Custom White Balance: For more precise control, consider setting the white balance manually. We can do this using a white balance card or by adjusting the Kelvin value in your camera settings.
Experiment and Practice: Different lighting situations affect the color temperature of your photos. Test various settings and practice in diverse environments to help you understand how white balance affects your images. And over time, you will develop a better eye for accurate colors.
9. Use a Histogram for Better Exposure in Your Photography
If you’re new to photography, you may have heard the term “histogram” before. But maybe you never really understood what it is or why you should care.
In short, a histogram is a graphical representation of the tones in your image.
The Role of a Histogram in Digital Photography
A histogram plays an important role in achieving optimal exposure in your photographs.
It gives you a graphical representation of the brightness levels, light distribution, and shadows in your image. This helps you understand exposure in a more scientific way.
In a histogram:
The left side represents the dark areas or shadows
The middle section represents mid-tones
And the right side represents highlights or bright areas
How to Use a Histogram for Optimal Exposure
To use a histogram for better exposure, follow these four simple steps:
Activate The Histogram: Most cameras have a setting that enables histograms. Turn it on to view the histogram while shooting or reviewing photos.
Analyze The Histogram: Examine the distribution of brightness levels in the graph. A balanced histogram shows a distribution across the entire range, from shadows to highlights.
Adjust Your Camera Settings: Based on the histogram, tweak your camera settings. For example, the exposure, aperture settings, shutter speed, and ISO to produce the desired brightness and highlight levels.
Re-Shoot and Review: Take another shot using the updated settings and review the histogram again. Repeat steps 2-4 until you reach the desired exposure.
Remember, a histogram is a handy tool, but ultimately, rely on your creativity and visual eye while finding the perfect exposure for your shots.
But when you use histograms as a beginner, you’ll become more confident and knowledgeable about your digital camera. Letting you take amazing photographs in various lighting environments.
10. The Secret to Shooting Great Photos: It Takes Practice!
As a beginner photographer, practice makes progress (not perfect).
You won’t be able to shoot good photos if you don’t put in the time and effort to learn the basics of photography and practice regularly.
Why Practice Matters in Photography
Photography, like any skill, requires consistent practice to improve.
As you practice, you gain a deeper understanding of your camera and various techniques.
Making mistakes is a natural part of the learning process in photography. When you identify your mistakes and work to correct them, you progress much faster in developing your skills.
Tips for Regular and Productive Practice as a New Photographer
To learn photography faster, make your practice sessions effective by following these tips:
Set Specific Goals: Outline what you aim to achieve with your photography, such as focusing on a particular subject, style, or technique. This will help you streamline your practice sessions and track your progress.
Schedule Regular Practice Sessions: Allocate dedicated time to practice your photography. It can be daily, weekly, or even monthly. The more frequently you practice, the more confident you’ll be with your camera and techniques.
Get Feedback: Share your work with fellow photographers, friends, or online communities. Constructive criticism will help you identify areas you need to improve in as you gain valuable insights from others.
Experiment With Different Techniques: Don’t limit yourself to a single style of photography. Explore different subjects, lighting effects, post-processing, and composition techniques to broaden your skill set.
Learn From Others: Use the internet to find resources and tutorials on photography. As you progress, online articles, videos, and courses can provide information, guidance, and inspiration.
Embrace Your Mistakes: Understand making mistakes is part of the learning process. Instead of being disheartened, study and question what you’re doing. Use your errors as opportunities to grow and refine your skills.
By following these tips and practicing, you’ll notice a significant improvement in your photography.
Bonus Tip: Learn How to Hold Your Camera to Prevent Camera Shake
Learning how to hold your camera properly might sound obvious.
However, many beginner photographers do not know how to hold their cameras correctly. This causes shaking and blurry images.
And yes, you can always use a tripod to prevent camera shake. However, holding your camera properly is important to avoid unnecessary movement.
And don’t forget to hold it with two hands! Because it’s easier to avoid camera shake with two hands.
Frequently Asked Questions
What are the essential tips for new photographers?
For beginner photographers, start with understanding the basics of photography. For example, the exposure triangle (ISO, shutter speed, and aperture), composition, and lighting. Get to know your camera and its settings, and always practice by taking plenty of photographs. Also, study the works of other photographers and learn from them.
How can I improve my digital photography skills with a phone camera?
Phone cameras have advanced significantly, enabling you to capture professional-quality photos. Start by familiarizing yourself with your phone’s camera features and settings. Practice techniques like the rule of thirds and good composition to enhance your photos. Use natural light and explore various editing apps to refine your photos further.
Which basic camera settings should I learn first?
For beginners, it’s essential to learn the three primary camera settings: ISO, shutter speed, and aperture. These settings affect the exposure of a photo and are the foundation for understanding photography. Knowing how to adjust your camera settings is important to take good photos. And with an intimate understanding of your camera, you can swiftly navigate between modes and features.
How do I start photography as a hobby?
Starting photography as a hobby doesn’t require a large investment. You can begin with a simple camera or even your smartphone. To start your photography journey, learn the basics and practice regularly. Connect with other photographers online and exchange ideas, get feedback, and learn from anyone willing to teach you. You can also attend online and offline workshops or classes to develop your skills further.
What is the workflow process in photography?
The workflow process in photography involves planning, shooting, organizing, editing, exporting, and sharing. Planning includes selecting your subject, scouting locations, and deciding on the equipment. Shooting involves taking photos with proper composition, device settings, and lighting. Organizing your photos includes sorting, renaming, and creating backup copies. Editing entails adjusting colors, cropping, and the retouching of images. And exporting or sharing your work may involve printing, emailing, or posting them on your social media accounts. Master this workflow, and you’ll be a pro at producing high-quality photographs efficiently and organized.
