How to Review and Analyze Photos as a New Photographer
As photographers, we have to review and analyze photos constantly.
And if you’re unsure what an image is missing or where to even start with this process, everything seems fine.
But, as a new photographer trying to learn and get better, “fine” doesn’t cut it, right?
Nope.
That’s why I’m going to share how I’d review photos as a new photographer.
I’ll go over the different things I review and analyze when looking at photos so you can spot weaknesses in composition, lighting, focus, and more.
The Best Tips to Review and Analyze Photos
Getting right to it, here are my tips for reviewing and analyzing your photos as a new photographer:
- Technical Factors: Check for technical accuracy, such as focus, exposure, and sharpness. Assess whether the photo is well-lit and if the colors appear natural or as intended. Is the image free from noise, and are the details crisp?
- Composition: Look at the composition of the photo. Analyze the use of elements like the rule of thirds, leading lines, framing, and symmetry. Consider whether the composition effectively guides the viewer’s eye through the photo and if it adds to the overall impact of the image.
- Lighting: Evaluate the lighting in the photograph. Good lighting can make or break an image. Notice how the light interacts with the subject and whether it enhances or detracts from the mood of the photo.
- Emotion and Storytelling: Consider what emotions the photo evokes and if it tells a story. A strong photograph often communicates an idea or emotion to the viewer.
- Subject Matter: Reflect on the subject of your photo. Is it interesting or engaging? Does it stand out or get lost in the background? Is there a clear focal point?
- Intent vs. Outcome: Think about what you intended to capture versus what you actually captured. Sometimes a discrepancy between these two can lead to a learning opportunity.
- Post-Processing: Analyze the post-processing. Is it subtle and enhancing the photo, or is it too heavy-handed? Could the image be improved with different post-processing choices?
- Consistency: Look for consistency in your work to identify your style. It can be in the type of subjects you shoot, the lighting you use, or the color palettes you prefer.
- Study the Histogram: Learn to read the histogram on your camera or photo editing software. It provides information about the tonal range of the image and can help you understand your exposure levels better.
- Print Your Work: Seeing your work in print can give you a different perspective compared to viewing it on a screen. It can highlight issues with exposure or color that you might not have noticed on your monitor.
- Reflect on the Context: Sometimes, a photo’s strength comes from the context in which it was taken. Reflect on the story behind the photo, the circumstances, and how they might affect the viewer’s interpretation.
Keep reading if you’d like some more context on how to analyze your photos.
Analyzing The Elements of a Photograph
You’ll want to dissect the different elements that make up the image.
Identify the Focal Point and Subject
The first task is to determine where your eye naturally lands. That’s the focal point.
The subject—whether it’s a person, object, or landscape feature—is often, but not always, the focal point. Ask yourself:
- Is the subject clear and prominent? If not, consider why.
- What is the story here? Every subject tells a part of the photo’s story.
- Do lines or shapes guide your eye to the subject? Note how these elements work to focus attention.
Depth and Balance in Photography
Now, take a step back and assess the photo’s composition for depth and balance. This involves more than just the subject. It’s about the entire scene.
Depth is created by using elements like lines, which can be straight, curved, or leading, and by layering the background, midground, and foreground. Check for:
- A sense of three-dimensionality. Does the photo feel like a window into another world?
For balance, you want to detect the photo’s visual weight. Because not everything must be centered to achieve balance. Sometimes it’s about the distribution of objects, colors, and space.
- Notice how different areas of the photo interact. Is there symmetry or an aesthetic tension?
- Are there contrasting elements like light and shadow or different colors that add to the dynamic of the photo?
Technical Aspects of Photo Analysis
Now, we’ll focus on two critical technical factors: exposure and focus, as well as how shutter speed and aperture affect your images.
Assessing Exposure and Focus
Exposure is all about the amount of light that hits your camera sensor. It’s a balancing act — too much light leads to an overexposed, washed-out image, while too little results in an underexposed, murky photo.
To analyze exposure:
- Check the Histogram: A spike on the right indicates overexposure; on the left, underexposure.
- Zoom In: Assess whether the highlights and shadows retain details.
Focus, on the other hand, is about sharpness. It determines which areas in your photo are crisp and guides the viewer’s eye. For precise focus analysis:
- Ensure your subject is clear, not blurry. Unless intentional blur is used for artistic effect.
- Review the photo at 100% magnification to confirm the focus is on the right area.
The Role of Shutter Speed and Aperture
Next, let’s talk about two camera settings that significantly affect your photos’ appearance — shutter speed and aperture.
- Shutter Speed: It’s the duration for which the camera shutter is open. A fast shutter speed can freeze motion, while a slow shutter speed can create a sense of movement or blur.
- Aperture: This refers to the size of the lens opening when a picture is taken.
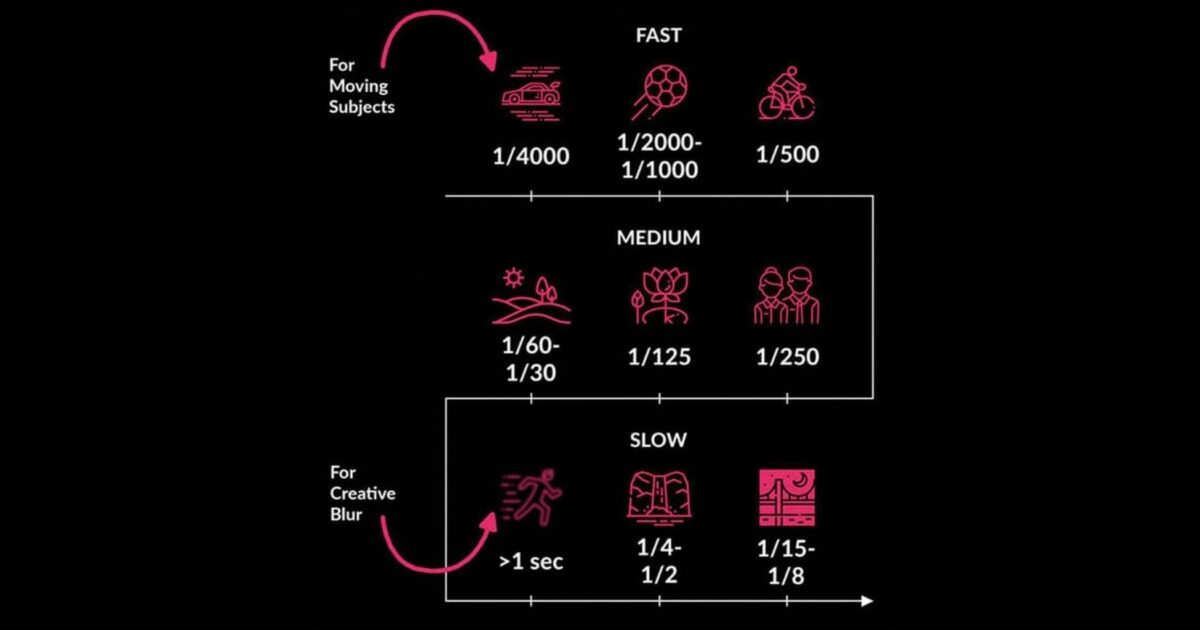
When you learn about exposure, focus, shutter speed, and aperture, you’re on your way to creating photos that not only look good but also tell a story.
Developing The Photographer’s Eye
When you’re reviewing and analyzing photos, you need to look beyond the obvious.
Comprehending Color and Tone
Think of color and tone as the language of photography. These elements have their own vocabulary made up of hues, saturation, and luminance.
When reviewing and analyzing photos, you have to become somewhat fluent in this visual language.
- Hue: Refers to the name of a color (like red or blue). As a new photographer, notice how different hues complement or contrast within a photo.
- Saturation: The intensity or purity of a color. Highly saturated colors will pop and grab attention. And desaturated colors are more subdued and can create a sense of calm or nostalgia.
- Tone: Often talks about the lightness or darkness of an image. Higher contrast with deeper tones can add drama. While softer tones might tell a gentler story.
Understanding these factors will help improve your photographic style and contribute greatly to the storytelling aspect of your images.
How to Evaluate Mood and Emotion in Your Photos

Mood and emotion are the heartbeat of a photograph.
They breathe life into a scene and draw the viewer into the world you’ve captured. Here’s how you can assess them:
- Observe the Lighting: Is it harsh or soft? Bright or muted? The quality of light can set the stage for the image’s emotional impact.
- Consider Context: What’s happening within the frame? The interaction between subjects, their expressions, or the unexpected details can all whisper stories of joy, sorrow, tranquility, or tension.
By tuning in to these subtle cues, you’ll sharpen your ability to see the unseen, overlooked, and other areas where you can improve when it comes to your work.
Creative and Constructive Photo Critique
Now, let’s talk about how to give and take advice like a pro.
How to Offer Constructive Photography Criticism
When you’re reviewing someone’s photograph, the goal is to provide constructive criticism that nurtures growth rather than deflates enthusiasm.
Here’s how:
- Start With the Positives: Identify what works well in the image. It might be the composition, use of light, or even the emotion it evokes.
- Present Areas for Improvement: Instead of pointing out what’s wrong, suggest alternatives. For instance, “The subject could stand out more with less background clutter.”
- Be Specific: Vague advice doesn’t help. Instead of saying, “Make it pop,” explain how, maybe by increasing contrast or adjusting brightness.
- Use Respectful Language: Feedback should be about the photo, not the photographer. Express your opinion without diminishing theirs.
Receiving and Applying Feedback Positively
When it comes to feedback, here are some general recommendations:
- Detachment is Your Friend: View feedback on your photograph not as personal criticism. But as advice to help you improve.
- Seek Specifics: If the feedback is unclear, ask for details. What exactly about the lighting or framing could change?
- Consider All Opinions: Not everyone’s advice will echo yours, and that’s okay. Filter through the feedback and apply what aligns with your creative vision.
Critiques are a source of creative ideas and constructive advice.
And regardless of whether you’re on the giving or receiving end, respect is important. Photography is subjective, and each photo critique is a step toward getting better.
Advanced Photo Analysis Topics
Diving deeper into the art of photo analysis can elevate your work from mere images to irresistible stories.
Let’s explore how black-and-white photography and the art of storytelling can add layers of meaning and emotion to your photos.
Black and White Photography
Understanding Tonal Contrast: Black-and-white photography strips away the distraction of color, drawing attention to the shadows, highlights, and the spectrum of gray tones in between.
A well-executed black-and-white photo leverages these elements to guide your eye and accentuate the subject. Study the tonal contrast in examples from the masters of black and white photography and notice how it adds substance and emotion to their narratives.
Analyzing Texture and Detail: Without color, texture becomes a star performer in your visual storytelling.
Pay close attention to the surface details and patterns in your image. A rough bark, a smooth pebble, or delicate wisps of hair can provoke thoughts and feelings in subtle yet profound ways.
Storytelling Through Imagery
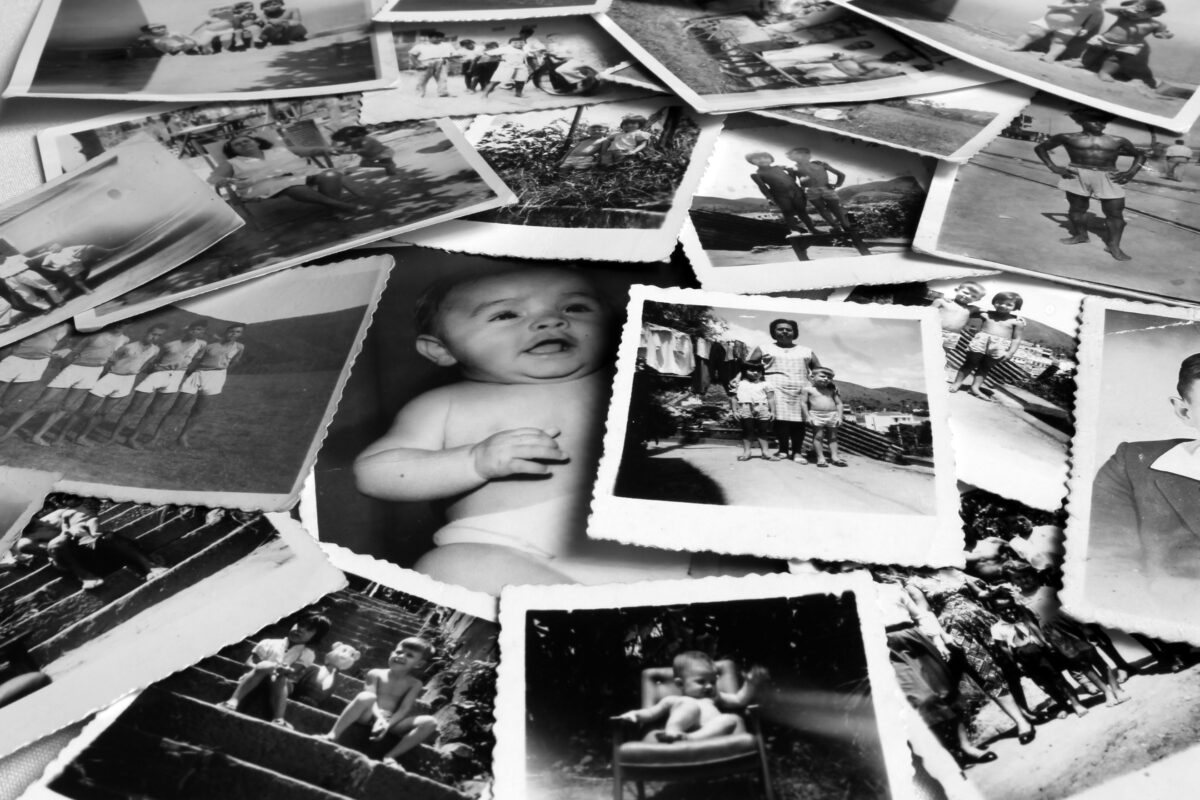
Crafting Your Narrative: Every photo tells a story.
Your role as a photographer is to figure out how you’ll share that narrative.
Look at the scene you’ve captured and ask yourself:
- What is the underlying story here?
- Are there elements like gestures, expressions, or actions that convey a certain emotion or meaning?
By analyzing these components, you can learn to construct a compelling story through your lens.
Engaging with Symbolism: In photography analysis, symbolism can enrich the narrative. A lone tree might represent resilience, while an open door could symbolize opportunity.
Discover the symbols within your photos and consider how they contribute to the story you want to share. But remember, your symbols should be clear and impactful, not convoluted or confusing.
And as you explore these advanced concepts in your photo analysis, you’ll begin to see beyond the surface of your images and into the depth of what they can represent. With practice, your photography can evoke feelings and thoughts.
And, ultimately, tell stories that connect with the viewer.
Frequently Asked Questions
What are the key elements to focus on when critiquing a photograph?
Consider examining the image’s composition, lighting, subject matter, and technique. The composition involves understanding the arrangement of elements in the frame, while lighting sheds light on mood and atmosphere. The subject matter is the image’s main focus, and technique encompasses the photographer’s skills and camera settings used to capture the photograph.
How should I begin a detailed analysis of a photographic image?
Start your analysis with your initial emotional response to the photograph. What does it make you feel? Then, begin dissecting the techniques used by the photographer, such as the rule of thirds, balance, contrast, and focus. These technical aspects can offer insight into the image’s impact.
Can you describe the four-step process for conducting a photography critique?
Sure, start by describing what you see without any judgment. Next, analyze how the photograph makes you feel. Then interpret the possible meanings or messages the image conveys. Finally, evaluate the photo’s effectiveness in relation to its purpose or the impact it seeks to make.
What tools or apps are recommended for beginners analyzing photographic work?
For beginners, Adobe Lightroom is a user-friendly tool that offers powerful image analysis capabilities such as zoom, compare, and filter functions. Additionally, mobile apps like Snapseed provide a hands-on approach to editing which can help you understand the impact of various adjustments.

